Sand Loop Level 487 Solution Walkthrough | Sand Loop 487
How to solve Sand Loop level 487? Get instant solution for Sand Loop 487 with our step by step solution & video walkthrough.
Sand Loop Level 487 Guide: The Wizard Chick Puzzle
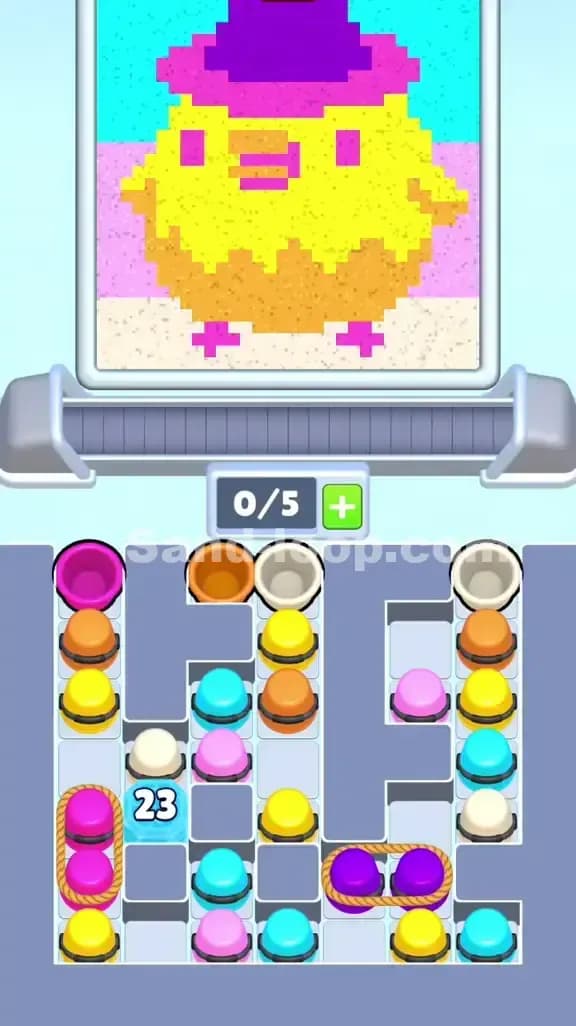
Sand Loop Level 487 features a pixel art "Wizard Chick." It is a yellow bird wearing a purple wizard hat with a bright pink rim. Don't let the cute face fool you. This is a heavy logic level. You aren't just fighting the timer or the physics; you are fighting a very restrictive tray layout. The supply tray is chopped up by grey dividers that look like Tetris pieces, and they dictate exactly how you can pull cups.
The color palette for Sand Loop Level 487 is deceptively simple but requires strict management. You have Yellow for the upper body, Orange for the belly, Purple for the hat, Magenta for the hat rim and feet, Cyan for the sky, and White for the ground. The logic here is centered on the Ice Block and two sets of Ropes. If you pull the wrong colors too fast, you will hit a deadlock. The slot economy is tight—you only have 5 slots total. If those 5 slots fill up with colors the dispenser isn't asking for, it’s game over.
Sand Loop Level 487 Solution: The Wizard Chick
When you look at the top of the screen in Sand Loop Level 487, you see the goal. The Wizard Chick is centered. The Yellow and Orange sections of the body take up the most real estate, but the background Cyan and White are what usually kill a run.
Color Palette Deep Dive
- Tangerine Orange: Used for the lower half of the chick's body. These cups are mostly at the top of the tray, so you have to use them early.
- Saturated Yellow: This is the main body. You have yellow cups scattered across the middle and bottom of the tray.
- Deep Purple: Reserved for the top of the wizard hat.
- Hot Magenta: This covers the hat rim, the tiny eyes, and the feet. It’s a detail color, which means you need to be precise with your taps.
- Sky Cyan: The background. In Sand Loop 487, the cyan is split into two side pillars.
- Paper White: The bottom ground and the very top corners. One of these is trapped under an Ice Block.
The Danger Zones
The biggest danger zone in Sand Loop Level 487 is the hat rim. The Magenta sand has to land in a very thin horizontal strip. If your timing is off on the Conveyor, you'll spill pink sand all over the purple hat or the yellow head. Another mess-up point is the transition between the Orange belly and the White ground. If you over-pour orange, it creates a muddy border that ruins the pixel-perfect finish.
Fill Order Prediction
In Sand Loop Level 487, you should prioritize the body. Start with Orange and Yellow. These are the "bulk" colors. While you are pouring these, you are clearing space in the tray to reach the roped-off colors and the Ice Block. Do not touch the Cyan cups until the chick is at least 50% done. If you fill the background first, you won't have the specific cups needed for the hat rim later.
Tackling the Supply Tray in Sand Loop Level 487
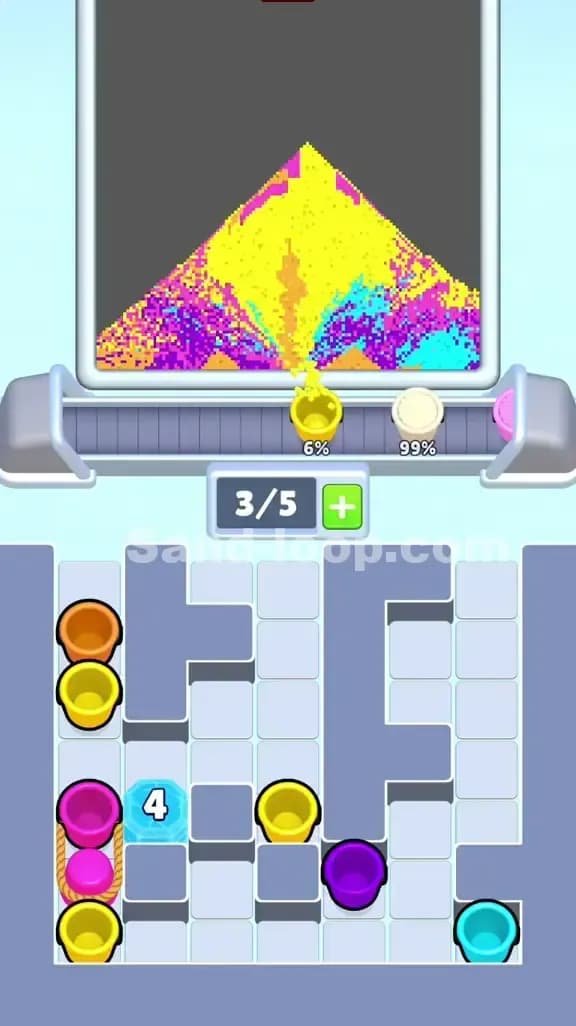
The supply tray is the real boss of Sand Loop Level 487. It’s divided into three main vertical columns by grey blocks.
The first major obstacle is the Ice Block 23 on the left side. It is sitting directly on a White cup. You cannot get that white sand until you've processed 23 other cups or interactions. This means you must cycle through the Orange and Yellow cups rapidly to chip that number down.
Then you have the Ropes. On the far left, there is a rope holding two Magenta cups together. On the bottom right, there is another rope binding two Purple cups. Ropes mean you have to take both cups at once. This is a massive drain on your 5-slot capacity. If you have 4 slots filled and you tap a roped pair, you can't take them. You must keep at least 2 slots open if you plan on grabbing roped cups.
The "F" shaped divider on the right side of the tray is particularly mean. It traps a Yellow cup and a Cyan cup at the very bottom. You have to clear the entire right column just to reach them.
Sand Loop Level 487 Step-by-Step Walkthrough
Success in Sand Loop Level 487 is all about the "Dependency Chain." You need the White cup for the ground, but the Ice Block says no. You need the Magenta for the feet, but they are roped.
Clearing the Ice Block
Your very first taps should be the Orange and White cups sitting at the very top. Don't wait. Get them onto the Conveyor immediately. As the dispenser starts asking for Yellow, pull the yellow cups from the middle column. Every time a cup finishes its pour and exits the screen, it counts toward the Ice Block 23. You need to keep a constant flow. Do not let the Conveyor run empty. Even if the dispenser isn't currently asking for a color, if you have a free slot, pull a cup to keep the tray moving.
Navigating the Ropes
Once you've cleared the top layer of the middle and right columns, you'll see the Purple roped cups. Wait until the dispenser is actually asking for Purple (usually for the top of the hat). Because these come in a pair, they will occupy 2 of your 5 slots instantly. If you pull them while your slots are at 4/5, you'll jam the tray.
While the purple is pouring, look at the left column. The Magenta roped cups are next. These are for the hat rim. The timing here is tight. Use the lead time of the Conveyor to your advantage. Tap the roped Magenta cups just as the dispenser finishes the previous color.
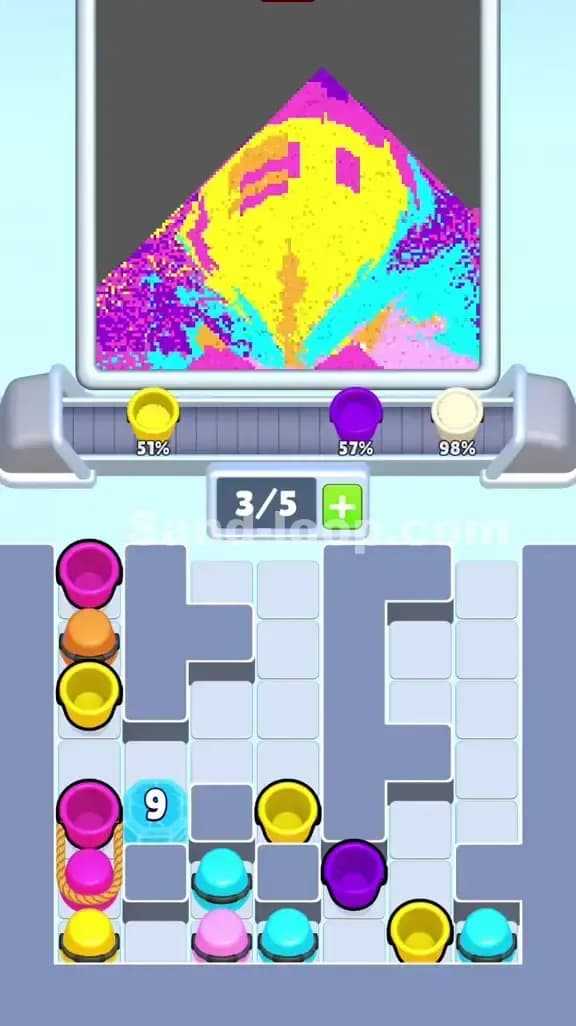
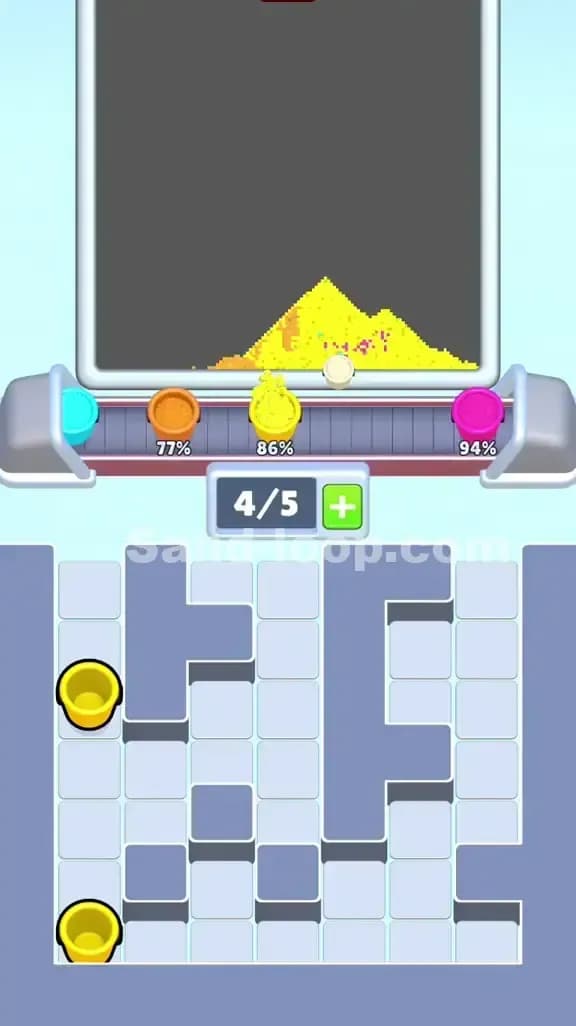
Filling the Background and Finishing
By now, the Ice Block 23 should be shattered. This releases the White cup. This is crucial for the bottom of the image. While the white sand is filling the base, start pulling your Cyan cups from the right side.
The Cyan background is the easy part, but players often fail here by running out of slots. If you have leftover Yellow or Orange cups that you didn't need, they might be blocking your path to the last Cyan cup. This is why you must use the "+" button if you get stuck, though if you followed the order of clearing the middle column first, you should have enough room to maneuver.
Finish the hat with any remaining Purple sand. If the feet aren't fully filled, the Magenta cups you pulled from the rope earlier should be sitting in your slots ready to go. Watch the percentage meters—once they hit 100%, stop pouring immediately to avoid contamination. This is how you beat Sand Loop Level 487.