Sand Loop Level 47 Solution Walkthrough | Sand Loop 47
How to solve Sand Loop level 47? Get instant solution for Sand Loop 47 with our step by step solution & video walkthrough.

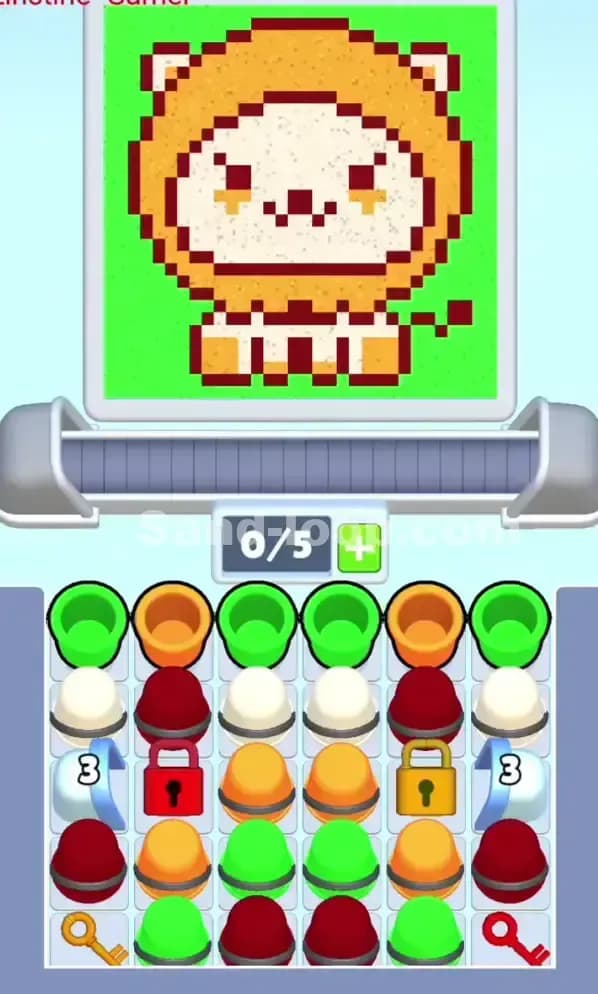
Sand Loop Level 47 Guide: The "Orange Blob Monster" Puzzle
This level features a quirky pixel art character that looks like a round, orange monster with purple accents and a bright cyan outline. Is it a ghost? A blob? Who knows.
Sand Loop Level 47 is definitively a Logic Level. While speed helps later, the initial setup is blocked by a complex web of Ice Blocks and Keys. You cannot just spam cups onto the conveyor. The hook here is the Ice Blockade in the center column. You have three massive stacks of ice (values 20, 20, 20) right down the middle, flanked by more ice and locks. If you don't clear these methodically, you will run out of slots instantly.
Sand Loop Level 47 Solution: The Orange Monster
Look closely at the canvas at the top of the screen.
- Color Palette Deep Dive: The monster is primarily Orange. It has deep Purple shading/details (mouth, eyes, shadow). The outline is a distinct Cyan (light blue). The background is Yellow. This means you need a lot of Orange and Yellow cups, but Purple and Cyan are critical for the details.
- The "Danger Zones": The tricky part is the Cyan Outline and the Purple Mouth. These are thin lines or small areas. If you pour a massive stream of Orange while the nozzle is over a tiny Purple pixel, you will ruin the percentage. The eyes are also small detail points that are easy to miss.
- Fill Order Prediction: The sand usually pours from the center-top outward or scans across. Based on the shape, the Orange body will likely be the primary fill zone early on, followed by the Yellow background. However, because of the ice blocks, your access to Cyan cups is severely delayed, meaning you might have to fill the body before you can even touch the outline.
Tackling the "Ice Spine" in Sand Loop Level 47
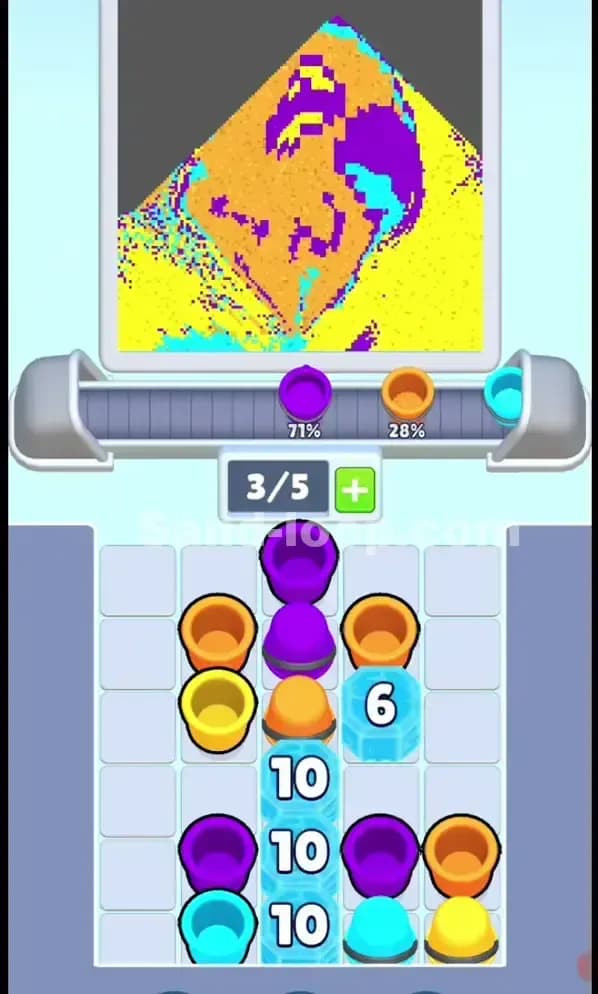
The most obvious obstacle in Sand Loop Level 47 is the vertical column of Ice Blocks right in the middle of your tray. Specifically, look at the stack: 8, 20, 20, 20.
This is an "Ice Spine." It splits your tray in half. You cannot access the cups at the bottom until you melt these blocks. The problem? To melt a "20" block requires matching 20 cups next to it. That takes forever. You likely won't clear the bottom "20" blocks by matching. You must rely on clearing the upper blocks (8 and 16) to trigger a cascade that brings the Keys into play. The Red Lock on the left and the Gold Lock on the right are the real gatekeepers.
Sand Loop Level 47 Step-by-Step Walkthrough
This level is about patience. Do not fill your 5 slots immediately. Keep at least 2 open at all times to manipulate the board.
1. Clearing the Top Layer (The "8" and "16" Blocks)
Your first priority is not the painting. It is the board. You have Orange, Yellow, and Purple cups available at the very top.
- The Ice Block (8) on the left needs 8 matches.
- The Ice Block (16) on the right needs 16 matches.
- Ignore the "20" blocks in the middle for now.
- Start by sending Orange and Yellow cups onto the conveyor. This will naturally start clearing the top left and right sections. As you clear cups, new ones fall. Focus on the left side first to whittle down that "8" block. It is weaker and breaks faster.
2. Popping the Red Lock
Once the "8" block on the left breaks, the cups above it will fall, shifting the columns. This should bring the Red Key (currently stuck on the right side, row 3) closer to a usable position, or allow you to access the Red Lock on the left.
- Watch the Red Key. It is crucial. You need to clear the cups under it or around it to get it to the conveyor.
- Use your 5 slots carefully. If the Red Key is buried, prioritize sending whatever cup color is blocking it.
- Once the Red Key hits the belt, the Red Lock on the left opens. This gives you access to a huge cache of Yellow and Orange cups on the bottom left.
3. The Gold Key and the Cyan Flood
The Gold Lock on the right is guarding the Cyan cups.
- You cannot finish the painting's outline without these Cyan cups.
- After the Red side is clear, shift focus to the right side. The "16" block should be nearly gone by now.
- Break the "16" block. The Gold Key (bottom left corner initially) needs to be freed.
- Once the Gold Key is processed, the Gold Lock opens. Warning: This releases the Cyan cups. Do not send them all at once. The Cyan is only for the outline of the monster. If you spam them while the nozzle is over the orange body, you waste them.
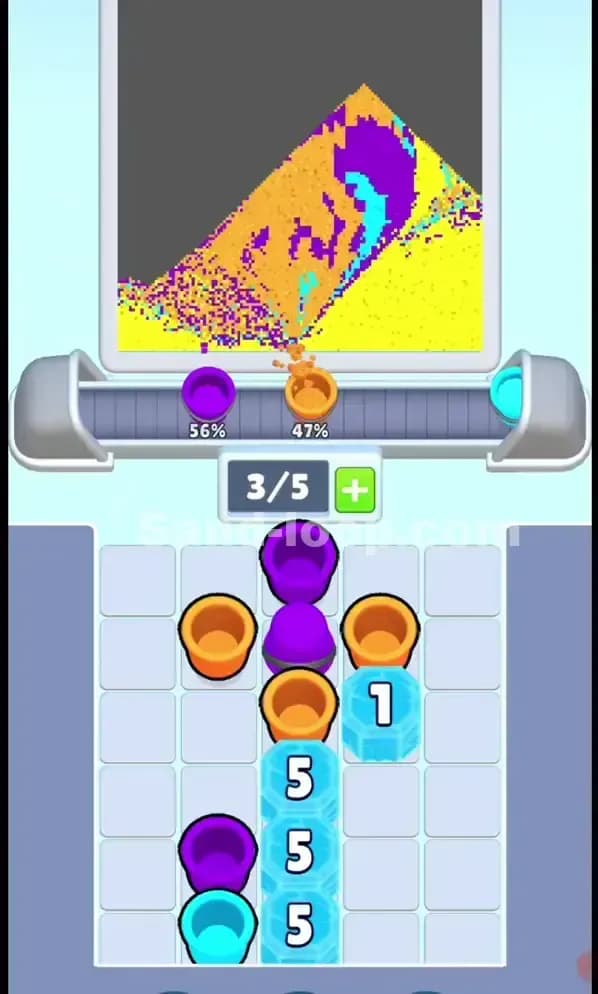
4. Melting the "20" Spine
You probably won't manually break the "20" blocks. Instead, as you clear the left and right columns (post-unlock), the board will shift. Focus on making matches adjacent to the spine if possible, but mainly just keep the conveyor moving. The painting consumes a lot of sand. Just keep feeding the correct colors. Eventually, the board clears itself.
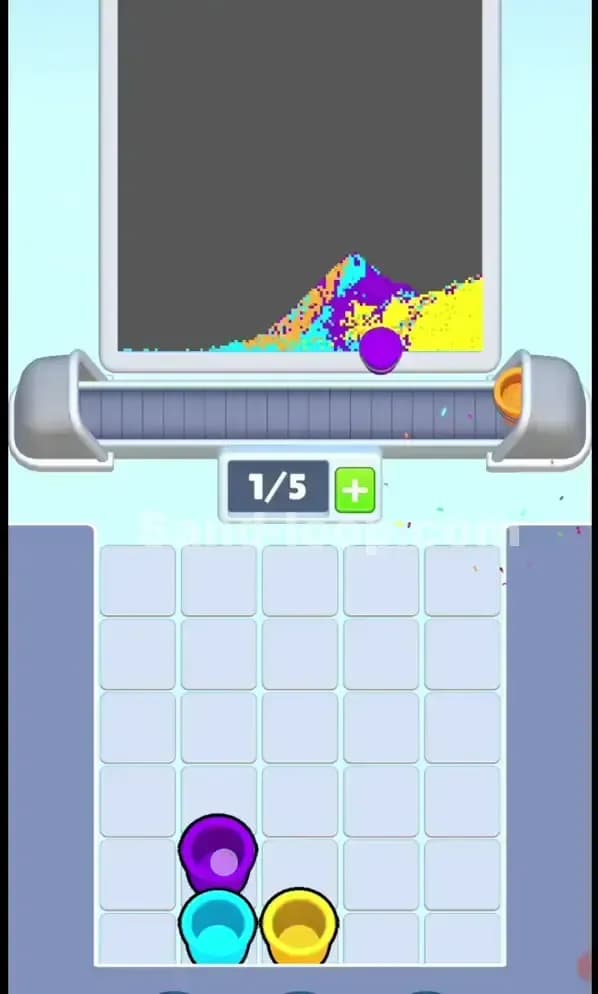
5. Finishing the Yellow Background
The final phase is usually the background. The Yellow cups are plentiful on the sides.
- Once the Orange body and Purple details are done, wait for the nozzle to move to the empty background space.
- Unload all remaining Yellow cups.
- Keep an eye on your "0/5" slot limit. It's easy to get excited at the end, tap too many Yellow cups, and deadlock yourself because a stray Purple cup is blocking the exit. Keep it smooth.