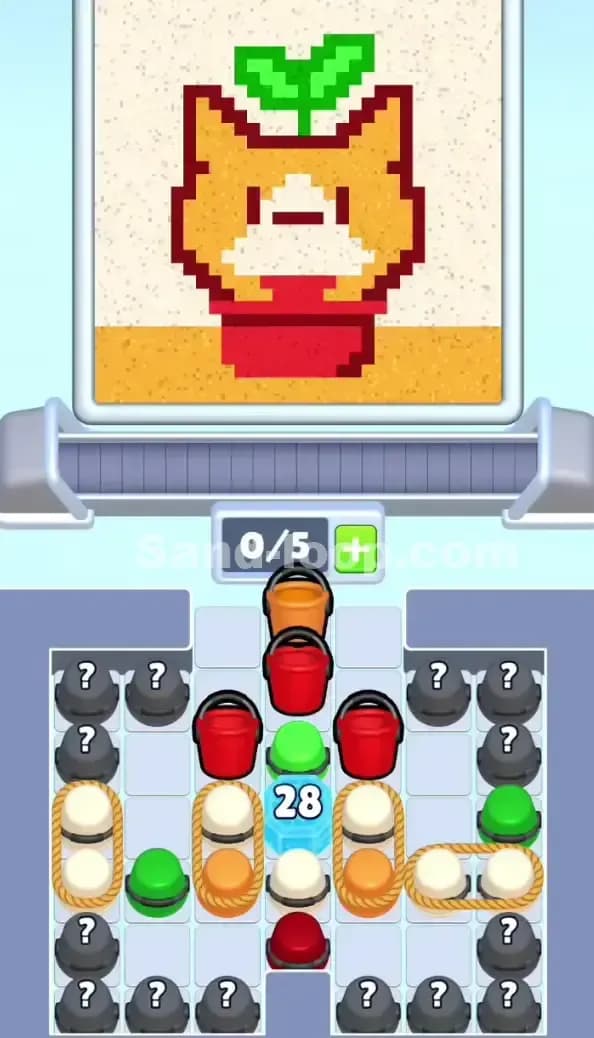
Sand Loop Level 494 Solution Walkthrough | Sand Loop 494
How to solve Sand Loop level 494? Get instant solution for Sand Loop 494 with our step by step solution & video walkthrough.

Sand Loop Level 494 Guide: The Pixel Volcano Puzzle
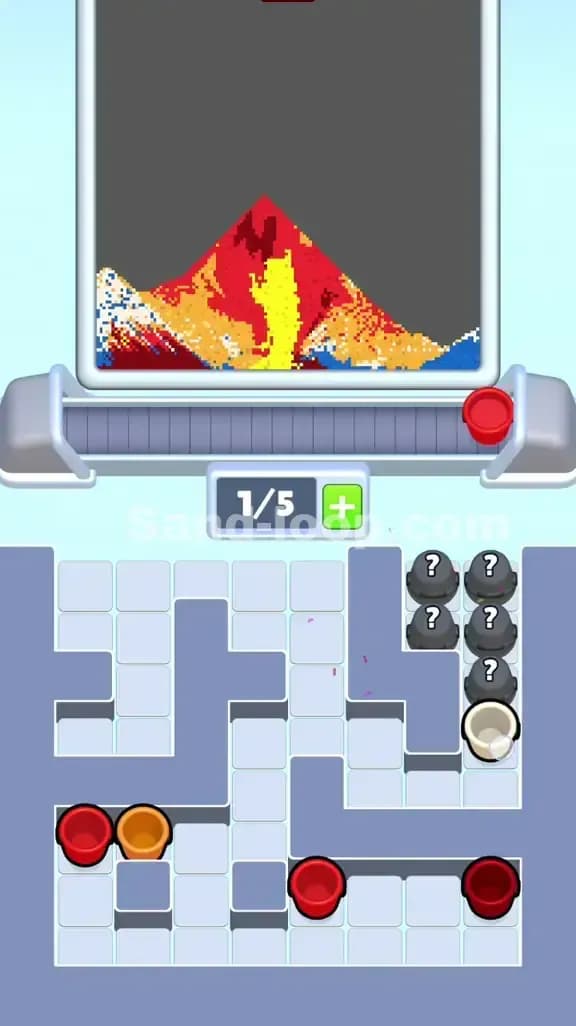
Sand Loop Level 494 is a brutal logic test disguised as a simple pixel art project. You aren't just pouring sand here. You are managing a multi-stage dependency chain. This level is a logic-heavy challenge that requires you to break physical barriers before you can even think about finishing the image. The art is a massive Volcano erupting against a pale sky. It looks cool, but the mechanics under the hood are designed to trip you up if you move too fast.
You have a Slot Capacity of 5. This is your biggest limitation. If you flood the conveyor belt with five cups and none of them are being filled, the game locks up. You need to maintain a "two-slot buffer" at all times. This gives you room to react when a color you actually need suddenly becomes available. Sand Loop 494 isn't about speed. It is about clearing the path for the right colors at the right time.
Sand Loop Level 494 Solution: The Erupting Volcano
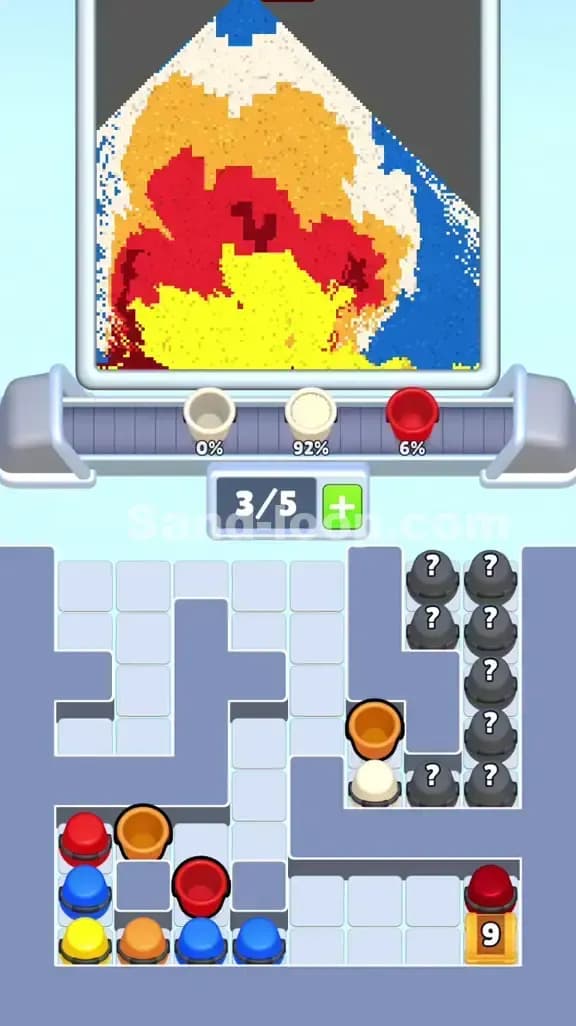
The art in Sand Loop Level 494 is a jagged Volcano with a complex color palette. You aren't just dealing with one or two shades. You have a full spectrum of heat.
Color Palette Deep Dive
- Red: The primary lava flow. This is used in large blocks in the center.
- Yellow: The core of the eruption. It forms the brightest part of the magma.
- Orange: The transitional heat between the yellow and red.
- Tan/Beige: This makes up the body of the mountain itself.
- White: Found at the very peak, representing ash or smoke.
- Blue: Minimal but dangerous. These are small pixels at the very bottom corners.
The Danger Zones
The "Danger Zones" in Sand Loop 494 are the Blue corners. Because there is so little blue in the final image, it is incredibly easy to overfill these. If you send a Blue Cup through and keep the sand running too long, you’ll waste sand and potentially block the next color. The transition between the Yellow and Red in the center is also tricky. The lines are jagged. You need short, controlled bursts of sand. Continuous pouring will ruin the sharp edges of the volcano's crater.
Fill Order Prediction
Ignore the background. In Sand Loop 494, you must prioritize the Mountain Body (Tan) and the Lava (Red/Yellow). The white ash at the top should be your secondary focus. The blue water or base pixels at the bottom are the final step. However, the game won't let you follow this order naturally because of the mechanical blocks in the supply tray.
Tackling the Ice Block and Blue Key in Sand Loop Level 494
The real boss of Sand Loop Level 494 isn't the art. It’s the Ice Block sitting in the middle of your supply tray. This block has a 10 counter on it. You cannot reach the Blue Key until that ice is gone. This means you have to cycle through ten cups just to break the barrier.
The Dependency Chain
Look at the Blue Lock in the bottom center. It is physically preventing the bottom row of cups from moving into the active queue. To open it, you need the Blue Key. To get the Blue Key, you must destroy the Ice Block. This is a three-step gate.
- Break the Ice: Use any available top-row cups.
- Grab the Key: Once the ice hits zero, the key is yours.
- Open the Lock: The key automatically moves to the Blue Lock, clearing the path for the Blue and Red cups at the bottom.
There is also a Red Cup with a 9 counter on the bottom right. This is a "tax" cup. You must fill this cup nine times before it clears the tray. It’s a resource sink designed to drain your red sand supply. Don't panic. Just keep feeding it whenever it hits the dispenser.
Sand Loop Level 494 Step-by-Step Walkthrough
Follow this specific sequence to beat Sand Loop 494 without a deadlock.
Clearing the Ice Block
Your first ten moves are purely functional. Do not worry about the art yet. Use the Red and Yellow cups at the top of the tray to chip away at the Ice Block (10). Tap them one by one. Do not spam-tap. If you fill the belt with five cups while the ice is still at 5 or 6, you will get stuck. Send a cup, let it pass the dispenser, and wait for the ice counter to drop. Once the ice is at zero, the Blue Key will be released. This will immediately open the Blue Lock, shifting the entire bottom row of cups to the left.
Navigating the Mystery Cup Trap
On the right side of the tray, you have a vertical column of Question Mark Cups. These are wildcards. In Sand Loop 494, these mystery cups often contain the White and Tan sand you need for the mountain body. You need to clear the central path to get these moving. Once the Blue Lock is open, start pulling the Orange and Blue cups to make room for these mystery containers. When a mystery cup hits the belt, watch the color indicator on the canvas. If it’s a color you have already finished, discard it by letting it pass without pouring.
Filling the Volcano Body
Now that the tray is moving, focus on the Tan mountain body. This is the largest surface area. Use long pours for the mountain, but switch to "tap-bursts" for the Red and Yellow lava. The Red Cup (9) at the bottom right will keep appearing. You must prioritize filling this specific cup. If you let it sit at the dispenser without filling it, you won't get to the cups behind it.
Keep your Slot Capacity at 3/5 or 4/5. Never hit 5/5. As you reach the end of Sand Loop Level 494, the Blue pixels at the bottom will be the final requirement. Use the Blue Cups you freed from the lock to finish these off. If you have extra Orange or Red cups on the belt, just let them pass. Accuracy is more important than using every cup you pull. Focus on the peak of the volcano last, using the White sand to cap off the eruption. Stay patient with the conveyor timing. The lag between your tap and the pour is about half a second. Lead your shots accordingly.