Sand Loop Level 210 Solution Walkthrough | Sand Loop 210
How to solve Sand Loop level 210? Get instant solution for Sand Loop 210 with our step by step solution & video walkthrough.

Sand Loop Level 210 Guide: The Giraffe Puzzle
Level 210 hits you with a charming pixel art piece: a Giraffe munching on a leaf, set against a bright blue sky. But don't let the cute face fool you. This is a heavy Ice Breaker level masquerading as a simple fill job. You have multiple layers of frozen keys (Ice Locks) that dictate the entire flow of the board. If you just tap cups randomly hoping to clear the tray, you will deadlock your 5-slot capacity in seconds.
The hook here is the separation of colors. The Giraffe's main orange and white tones are locked behind specific keys, while the Green and Cyan cups needed for the background are buried deep at the bottom or locked in ropes. This level is tricky because the Roped Cups on the sides act as "trash" if you aren't ready for them, clogging your conveyor belt while you desperately try to break the central ice blocks.
Sand Loop Level 210 Solution: The Giraffe Portrait
Let's break down the canvas at the top. You aren't just painting random blocks; the geometry matters.
Color Palette Deep Dive:
- Orange: Dominates the giraffe's skin and ossicones (the horn-like bumps). This is your primary fill color.
- Cream/White: Used for the muzzle and the lighter patches on the neck.
- Dark Red/Maroon: Used strictly for the eyes and nostrils.
- Pink: Two small patches for cheeks.
- Cyan: The massive sky background.
- Green: The bushes at the bottom and the leaf in the mouth.
The "Danger Zones": The eyes and cheeks are the killers. They require very specific, low-quantity colors (Dark Red and Pink). The tray layout puts these colors near the top, tempting you to use them early. If you send a Pink cup up the belt when the sensor is asking for Orange, you waste a slot. Worse, if you mistime the Dark Red for the eyes, you might accidentally paint over the orange spots, ruining your percentage.
Fill Order Prediction: Logic dictates working from the center outward. You need to establish the Giraffe's face (Orange/White) to trigger the progress needed for the background. However, the tray forces a different hand: you must deal with the Ice Blocks first, which means prioritizing whatever color is demanded by the lock numbers, often regardless of what looks best on the canvas.
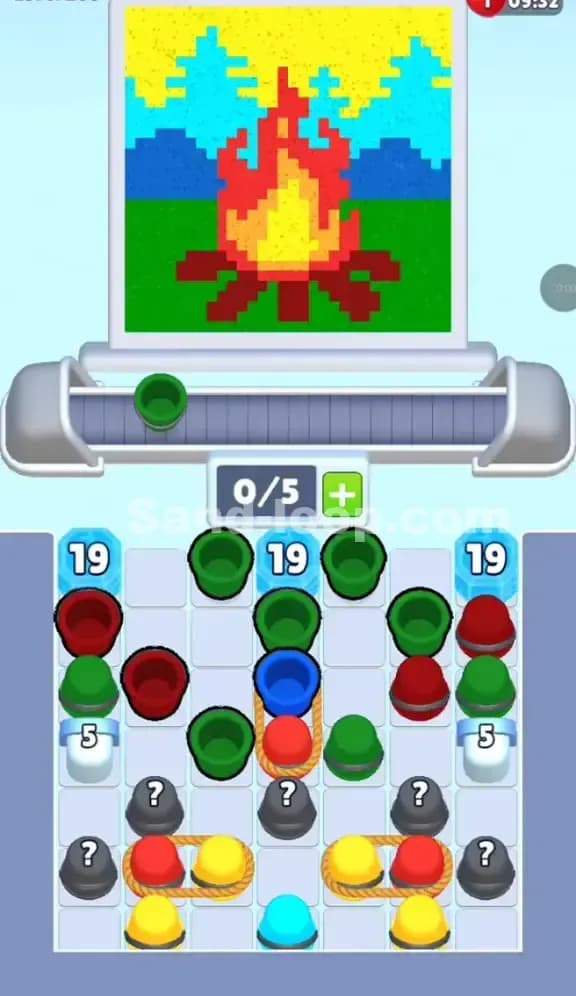
Tackling the Central Ice Locks in Sand Loop Level 210
The specific obstacle here isn't just one lock; it's the Dual Layer Ice System. Look at the center of the tray. You have two initial Ice Blocks labeled "3". Beneath them, further down, are two more Ice Blocks labeled "4".
Here is the mechanics trap: The "3" blocks are blocking the Dark Red cups. The "4" blocks are blocking the Cyan cups. You literally cannot finish the sky (Cyan) until you break the top layer of ice.
This creates a bottleneck. You have a 0/5 capacity. If you flood the belt with 5 cups that don't match the Ice Block requirement, you are stuck. You must feed the ice exactly what it wants—usually matching colors adjacent to it—to chip that number down. In Level 210, those top "3" blocks often require specific cup matches or simply clearing the cups immediately above them to count as a "break." You have to be surgical. Tap only what contributes to the break count.
Sand Loop Level 210 Step-by-Step Walkthrough
This level is a relay race. You are handing off control from one section of the tray to another.
1. Clearing the Top Row "Trash"
Your first priority is the top row of accessible cups: Green, White, Cyan, and Pink. Do not tap them all at once. Check the sand dispenser color. If it's pouring Orange, and you send up a Green cup, it just loops around and wastes space.
- Send the Pink and Dark Red cups only when the nozzle is painting the eyes/cheeks.
- Use the White and Cyan cups to start chipping away at the top Ice Blocks if the mechanics allow, or simply clear them to access the crucial "3" blocks below.
2. Breaking the "3" Ice Blocks
Once the top layer thins out, the focus shifts entirely to the two blocks labeled "3".
- These blocks are usually color-coded or break on adjacent clears. Focus your taps on the Orange and White cups sitting directly next to or above these blocks.
- Warning: Do not touch the Roped Cups (Orange/Cyan on the far left/right) yet. They are trapped by ropes and cannot move until the rope is cut or untied. Trying to move them now just confuses your eye.
3. Navigating the Roped Side-Stacks
Once you clear the initial center clutter, you'll see the ropes loosen on the side stacks. This releases a new wave of Orange and Cyan cups.
- This is the most dangerous moment for clogging. You have 5 slots. If you tap four Orange cups from the roped stack but the picture needs Green for the bushes, you stall.
- Only release the Roped Orange cups when you see the Giraffe's neck or face being painted.
- Keep 1 or 2 slots empty on the conveyor belt at all times during this phase to handle any "Mystery" (?) cups that might pop up from the bottom.
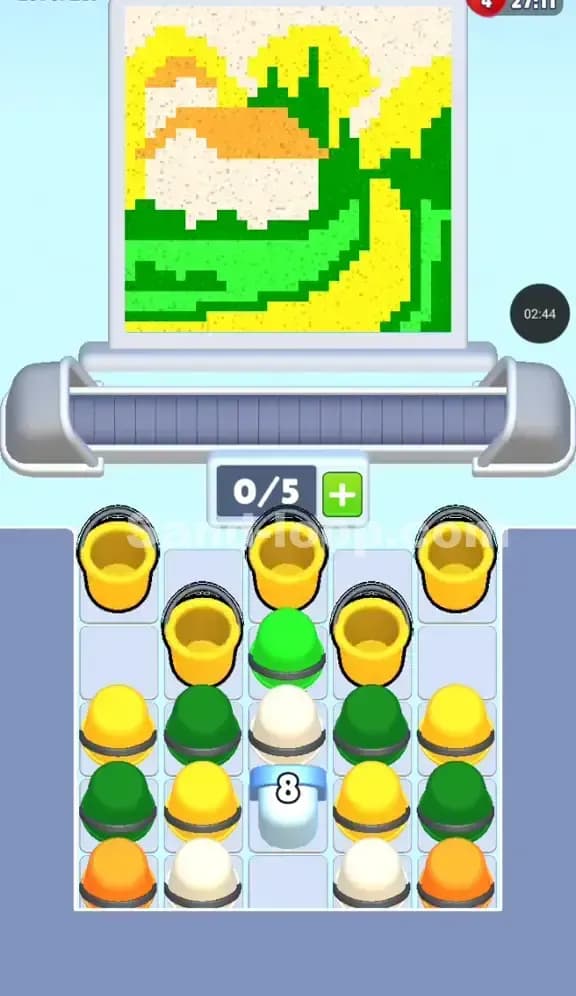
4. The Final "4" Ice Blocks and Background
The bottom half of the tray has the "4" Ice Blocks guarding the main supply of Cyan cups.
- By now, the Giraffe face should be mostly done. The dispenser will switch to background mode (Cyan/Green).
- Aggressively target the cups touching the "4" blocks. You need to shatter these quickly to release the massive amount of Blue needed for the sky.
- The Green Trap: Don't forget the bottom corners! There are Green cups at the very bottom left and right. These are for the bushes. Often, players finish the sky and realize they left two tiny green spots unpainted because the Green cups were stuck behind the last Ice Block. Make sure to interleave Green cups with your Cyan flood to finish the bushes early.