Sand Loop Level 201 Solution Walkthrough | Sand Loop 201
How to solve Sand Loop level 201? Get instant solution for Sand Loop 201 with our step by step solution & video walkthrough.

Sand Loop Level 201 Guide: The Geometric Tile Puzzle
Identify the Art: The Persian Rug
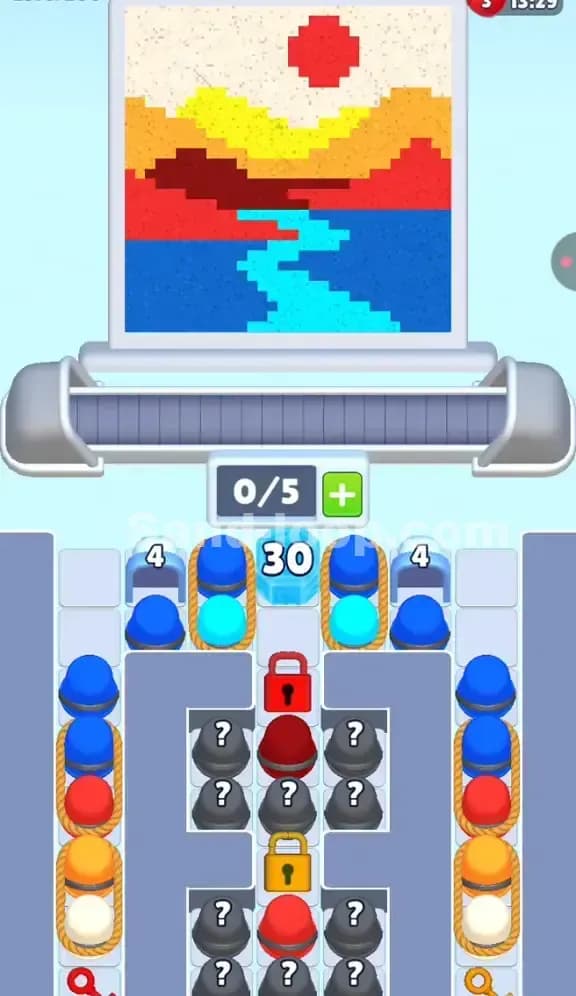
This level features a symmetrical, pixelated tile design that looks like a miniature Persian rug or a complex mosaic. It’s strictly a logic level. You aren’t racing a clock; you are fighting a clogged inventory. The challenge isn't speed, it's digging through layers of "trash" blocks to find the colors you actually need.
The Hook: Buried Reds and Yellows
The color palette is warm—heavy on Yellow backgrounds and Red accents—but your supply tray is capped with Blue buckets and massive white obstacles. You have to play colors you don't need immediately just to reach the ones you do.
Sand Loop Level 201 Solution: The Mosaic
Look closely at the target image. It’s dense.
- Color Palette Deep Dive: The design is anchored by a Yellow field. Over that, you have Red corner brackets and a central Blue diamond cluster. Orange acts as the binding agent, outlining the shapes.
- The "Danger Zones": The Blue diamonds. They are small. If you pour Blue too early or too late without checking the nozzle alignment, you’ll miss the center and ruin the symmetry.
- Fill Order Prediction: The game forces your hand here. While the Yellow background is the largest area, the Blue cups are physically on top of the stack. You have to paint the detail work (the diamonds) first, which is backward compared to most levels.
Tackling the "Countdown Barrier" in Sand Loop Level 201
The most obvious headache in Level 201 is the row of three White Blocks labeled '5'. These are Health Bar Barriers. They are not cups. You cannot fill them with sand. They sit there, blocking the massive reservoir of Red, Yellow, and Orange cups below.
- How they work: Every time you successfully clear a cup adjacent to them, their number drops. You need to process the buckets sandwiched between them (the Orange ones) and the Blue ones above them to chip away at this health bar. Until these break, your access to the bottom half of the tray is severely choked.
Sand Loop Level 201 Step-by-Step Walkthrough
Clearing the Blue Cap
Your very first move is forced. You have three Blue Buckets sitting at the very top of the supply columns. You cannot touch the Orange cups or the barriers until these move.
- Tap all three Blue Buckets to move them onto the conveyor.
- Timing Note: Watch the nozzle. It will paint the central diamond and the side diamonds. Do not add any other cups yet. Let the Blue finish pouring. If you crowd the belt here, you might misalign the paint for the next color.
Cracking the "5" Barriers
Once the Blue buckets are gone, you expose the second layer: the two Orange Buckets and the three White Barriers.
- You have a conveyor capacity of 5. You have two Orange buckets available.
- Pull the Orange Buckets immediately.
- As these Orange buckets are processed and filled, they will chip damage off the White Barriers.
- You will likely need to pull up cups from the sides of the barriers (where the Red and Yellow cups are starting to peek through) to finish destroying the white blocks. Prioritize any move that touches a white block.
The Yellow/Red Flood
Once the White Barriers shatter, the floodgates open. The bottom of the tray is a chaotic mix of Red, Yellow, and Blue.
- Check the Canvas: With the Blue diamonds done and the Orange outlines started, you mainly need to fill the large Yellow background and the Red corner shapes.
- Sort Carefully: Don't just tap wildly. Alternating colors on the belt can cause "stuttering" where the nozzle switches colors too fast, leaving gaps.
- Group your pours. Put 2-3 Yellow Buckets on the belt in a row to get a clean, continuous pour for the background. Then switch to a batch of Red Buckets for the corners.
- Keep one slot open on the conveyor (4/5 capacity) at all times during this phase so you don't accidentally deadlock yourself if a stray Blue cup pops up.