Sand Loop Level 35 Solution Walkthrough | Sand Loop 35
How to solve Sand Loop level 35? Get instant solution for Sand Loop 35 with our step by step solution & video walkthrough.
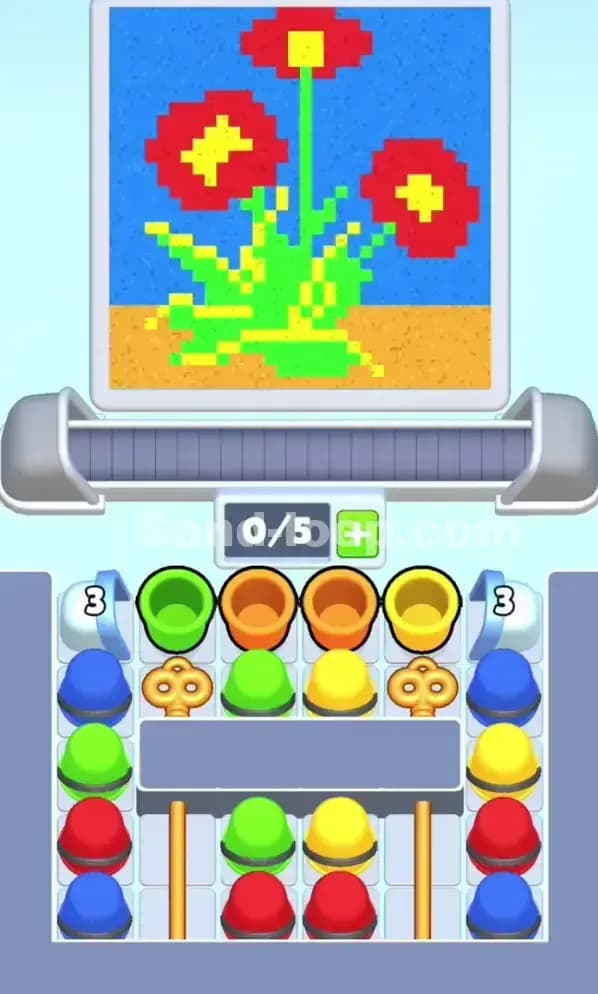


Sand Loop Level 35 Snapshot
The Canvas Goal
Sand Loop Level 35 presents a large, magenta-pink background with a central cyan oval shape framed by thick borders of dark blue, bright green, lime, and orange accents. The cyan center is the dominant "safe zone" you'll be filling, while the surrounding border colors—especially the dark blue ring and lime-green patches—need careful meter management. You're aiming for a balanced, clean fill without spilling into unwanted regions or oversaturating any single color before the others catch up.
Starting Setup and Constraints
You're starting with a conveyor belt capacity of 0/5 slots. Your supply tray is packed with a mix of colors: bright green, pink, dark blue, cyan, orange, and several mystery cups (hidden behind question marks) that you'll need to work around. The cyan cups are already visible and accessible on the right side of the tray, which is a huge advantage—you'll lean on those heavily early. However, the lime-green and orange cups are partially buried under other pieces, so you'll need to time your removals carefully to avoid jamming your conveyor with the wrong colors at the wrong moment.
Win Condition
Fill the canvas to complete Sand Loop Level 35 by meeting all color progress requirements without overshooting the background or wasting pours on contamination. You've got limited moves and no buffer for careless pouring—every tap of the dispenser counts.
Why Sand Loop 35 Feels Hard (The Actual Bottleneck)
The Real Problem: Color Meter Synchronization
Sand Loop Level 35's biggest challenge isn't the conveyor speed or slot count—it's that your cyan, dark blue, and border colors (green and orange) need to climb almost in lockstep, yet the tray's physical layout forces you to access them in an awkward sequence. You can't just spam cyan because it'll race past the others; you can't delay it because the meter window will close. The puzzle demands you juggle cup order and gap timing like a rhythm game with a two-beat delay.
Classic Traps
Trap 1: Over-pouring cyan too early. Cyan cups are right there on the tray, and you'll be tempted to load both immediately. Resist that urge. One cyan pour at a time, with deliberate gaps between, keeps the meter balanced and gives you breathing room to unblock the border colors.
Trap 2: Burying your good cups under blocked pieces. If you pull out a mystery cup to "clear space," you might accidentally trap a lime-green or orange cup underneath, forcing you to waste a slot waiting for the belt to cycle before you can access it. Plan unblocking moves at least one or two steps ahead.
Trap 3: Deadlock from slot overflow. With only 5 slots, it's trivially easy to jam the belt with low-priority cups (looking at you, extra pinks) while your critical blue or green cup sits useless in the tray. This level punishes greed.
Why It Looks Easier Than It Is
On first glance, Sand Loop Level 35 looks forgiving: the canvas is huge, the slot count is decent, and you've got visible cyan right away. But the color balance required and the buried cups combine into a trap that catches rhythm-game veterans off guard. I choked this level twice by flooding cyan, watched my meters desync, and then realized I couldn't recover without clearing a half-dozen "spacer" cups from the belt. It's frustrating because the solution is elegant once you see it, but getting there requires discipline and foresight.
Step-by-Step Walkthrough to Beat Sand Loop Level 35
Opening Rhythm: Your First Five Pours
Start by loading one cyan cup and one dark blue cup in sequence onto the belt, leaving one empty slot between them. Tap the dispenser twice—once for each cup as it passes the pour point. This staggered approach means you're not flooding cyan early while your blue meter lags. Watch the color progress bars climb in tandem. If cyan is already at 30% after two pours and dark blue is at 10%, you've gone too fast; you'll need to pivot to other colors sooner.
Next, identify which mystery cup or hidden piece is blocking your lime-green access. In Sand Loop Level 35, there's usually a puzzle-piece-like obstacle or a low-priority cup stacked on top of it. Don't rush to clear it yet; instead, load a pink cup (the least critical color for your canvas) to occupy the third and fourth conveyor slots. This gives you time to study the tray layout without jamming.
By your fifth pour, you should have cycled one cup off the belt completely. Now you've got one free slot. This is when you unblock the lime-green or orange, but only if you're confident about which cup it is. If it's still hidden, load another cyan instead and come back to it in thirty seconds. Patience wins Sand Loop Level 35.
Unblocking Plan: Freeing the Border Colors
The moment your first cup exits the belt (around pour 3–4), glance at the tray and identify the exact blocking piece. Is it a mystery cup sitting directly on top of lime-green? Is it a pink or orange that's wedged sideways? Touch it carefully to pull it up. On Sand Loop Level 35, the lime-green is often your second-most critical color (after cyan) for the border glow, so freeing it unlocks your mid-game flexibility.
When you do pull the blocking piece, place it in an empty tray slot if one's available—don't let it clog the top of a stack. If all tray slots are full, accept that you'll load this blocking cup onto the belt as a temporary placeholder. Treat it as a "spacer pour"—it doesn't contribute meaningfully to the canvas, but it clears the path for your real color.
Once lime-green is free, load it next. Don't pour immediately; just have it sitting on the conveyor belt, ready. This lets you control the moment it hits the dispenser, which is crucial for Sand Loop Level 35's color balance. Same applies to orange: free it, load it, but wait for the right beat to pour.
Mid-Game Control: Cycling and Gap Management
Around pours 6–10, you're in Sand Loop Level 35's rhythm groove. Your meters are climbing, and you're rotating colors based on which needs the boost. Here's the pattern:
Pour cyan, wait two beats, pour dark blue, wait one beat, pour lime-green, repeat. This isn't exact—adjust based on what the meters show—but it prevents any single color from racing too far ahead. Keep one conveyor slot empty at all times. This empty slot is your escape hatch: if you accidentally load the wrong color or need to pause and reassess, you can let an empty "beat" pass through the dispenser without consequence.
Watch the mystery cups carefully. Sand Loop Level 35 occasionally has a hidden booster or special cup (gold-trimmed, maybe?) buried in the tray. When it surfaces, you can choose to load it for a slow-pour advantage, or skip it to save slots for core colors. On your first attempt, I'd recommend skipping special cups and focusing on clean cyan, dark blue, and border pours. Once you've beaten Sand Loop Level 35 once, you'll know the mystery layout and can play advanced moves.
Never pour the same color twice in a row, even if its meter is low. That's a symptom of poor planning and usually means you've locked yourself out of other colors. If you find yourself stuck, stop, and mentally cycle through the tray: which color cup is currently accessible? Load it, even if it's pink or a filler. The action buys you a beat and clears a path.
End-Game Precision: The Final 10–20%
Once your color meters are all above 70%, you're in the home stretch of Sand Loop Level 35. At this point, meters are less forgiving—an extra cyan pour will overshoot and waste a slot. Slow down. Load cups, wait longer between pours, and use your empty slot more aggressively as a buffer.
If one color is lagging (say, orange is at 60% while cyan is at 95%), load orange cups exclusively for three to four pours, but don't pour all of them—let them sit on the belt, staggered, so you can tap the dispenser once per orange cup that passes. This "metered release" technique is Sand Loop Level 35's secret sauce for the endgame. Sounds weird, but it works: you're decoupling the loading rate from the pouring rate, which gives you frame-by-frame control.
Watch the canvas closely. The moment all meters hit 100% (or your target fill), stop pouring. Don't let cups sit under the dispenser a moment longer than necessary. Overshoot is instant failure on Sand Loop Level 35.
If You Mess Up: Recovery Tactics
Scenario 1: You overpoured cyan and cyan is now at 115%. You've wasted cup space and contaminated the canvas. On your next run, load cyan only once every three pours, and interleave it with dark blue and green. If you have a booster available (extra slot or undo move), use it now to clear the contamination.
Scenario 2: Orange or lime-green is still buried, and you're out of accessible cups. You've hit a deadlock. Load a placeholder cup (pink or even the mystery) to clear the tray, then pivot. This is painful but recoverable. On your next attempt, unblock those border colors earlier—around pour 2, not pour 8.
Scenario 3: Your meters are balanced at 70%, but you've got four cups on the belt and only one slot left. You're one pour away from a jam. Tap the dispenser once to cycle a cup off, then assess. Don't load anything new until you've got two empty slots visible. This is patience mode; embrace it. Sand Loop Level 35 respects restraint.
Why This Strategy Works in Sand Loop Level 35
Conveyor Lead Time and Slot Economy
When you tap the dispenser, the cup doesn't pour immediately—it travels the full length of the belt first. This delay (typically 2–3 cup-lengths on Sand Loop Level 35) is your planning window. By staggering cyan and dark blue loads, you're ensuring that by the time cyan is under the nozzle, your dark blue has already cycled most of the way to the pour point. The two meters climb almost in sync, which is exactly what the canvas color balance demands.
By keeping one empty slot visible at all times, you're avoiding the classic gridlock where a low-priority cup gets trapped waiting for a cup to cycle, and meanwhile, your critical color is burning in the tray inaccessible. This strategy converts the slot economy from a liability into a resource: that empty slot is literally buying you planning time.
Waste Prevention and Contamination Avoidance
This guide prioritizes clean, intentional pours over "continuous" spamming. Every tap is deliberate: you've loaded a specific cup, timed its arrival at the dispenser, and committed to the color. There's no room for "oops, I didn't mean to pour that." On Sand Loop Level 35, one wasted pour can derail your color balance and cost you the level.
By identifying the blocked colors early and freeing them, you're also preventing the temptation to spam placeholder colors and then realize (too late) that you've filled your slots with junk and can't access the orange you desperately need. Proactive unblocking is frontloaded work that pays dividends.
Consistency Across Runs
This route is predictable. If you follow the opening rhythm (cyan, dark blue, pink spacer, unblock, repeat), you'll hit a stable state by pour 6 every time. From that point, it's just reading the meters and adjusting the cycle. Sand Loop Level 35 doesn't have random elements (barring mystery cups), so a consistent strategy means consistent results. Your first three attempts might fail due to learning curve, but by attempt five, you should be clearing it regularly.
Extra Tips and Adaptations for Levels Like Sand Loop Level 35
Six Common Mistakes and Fixes
-
Mistake: Loading two cyan cups back-to-back because "cyan is the biggest color." Fix: Alternate cyan with dark blue. Meters must climb together, not in silos.
-
Mistake: Pulling a blocking cup without a clear plan for what replaces it. Fix: Before you unblock, know which freed color you're loading next. Unblock and load in one fluid motion.
-
Mistake: Pouring while distracted and missing the exact moment a cup reaches the dispenser. Fix: Slow your pour rate. Watch the belt cycle. If you need to look away, wait for an empty slot to pass through first, then look back.
-
Mistake: Trying to use a booster (extra slot) too late, when your meters are already imbalanced. Fix: Boosters on Sand Loop Level 35 are most valuable in the first 5–6 pours, when they let you load more colors faster. Save them for moments when you're waiting on a blocked piece.
-
Mistake: Assuming all mystery cups are "bad" and avoiding them entirely. Fix: On later attempts, experiment with one mystery cup. It might be a gold booster that accelerates pours—powerful if used at the right moment.
-
Mistake: Ending with slots still full of cups because you panicked and kept loading. Fix: Once all meters are above 90%, stop loading new cups. Tap the dispenser only for cups already on the belt. Clear your slots before the level ends.
Booster Recommendations
If Sand Loop Level 35 is giving you trouble after three solid attempts, consider these boosters:
- Extra Slot Booster: Adds a sixth slot to your belt. Use this if you're consistently hitting deadlock near the end. It gives you room to load a "filler" without sacrificing your last critical color.
- Slow Belt Booster: Slows the conveyor by 30%, giving you more time between pours. Fantastic for fine-tuning meter balance in the endgame.
- Undo Move: Reverse your last action if you overpoured a color. Use this only if you're otherwise locked out—it's precious, so save it for genuine disasters.
None of these are necessary to beat Sand Loop Level 35 if you play patiently, but they're there if you need a confidence boost or want to experiment with a faster rhythm.
Final Encouragement
Sand Loop Level 35 is a level that separates the rush-players from the tacticians. It's not brutally hard—it's just requiring you to think two moves ahead and respect the meter balance. Once you clear it, you'll have internalized the principles that carry you through the mid-game levels. You've got this. If you're still stuck after a few more attempts, head over to sand-loop.com for video walkthroughs, community tips, and strategies for other levels in the same difficulty bracket. Good luck, and enjoy the satisfying click of a perfectly balanced endgame pour.


