Sand Loop Level 353 Solution Walkthrough | Sand Loop 353
How to solve Sand Loop level 353? Get instant solution for Sand Loop 353 with our step by step solution & video walkthrough.
Sand Loop Level 353 Guide: The Seaside House Puzzle
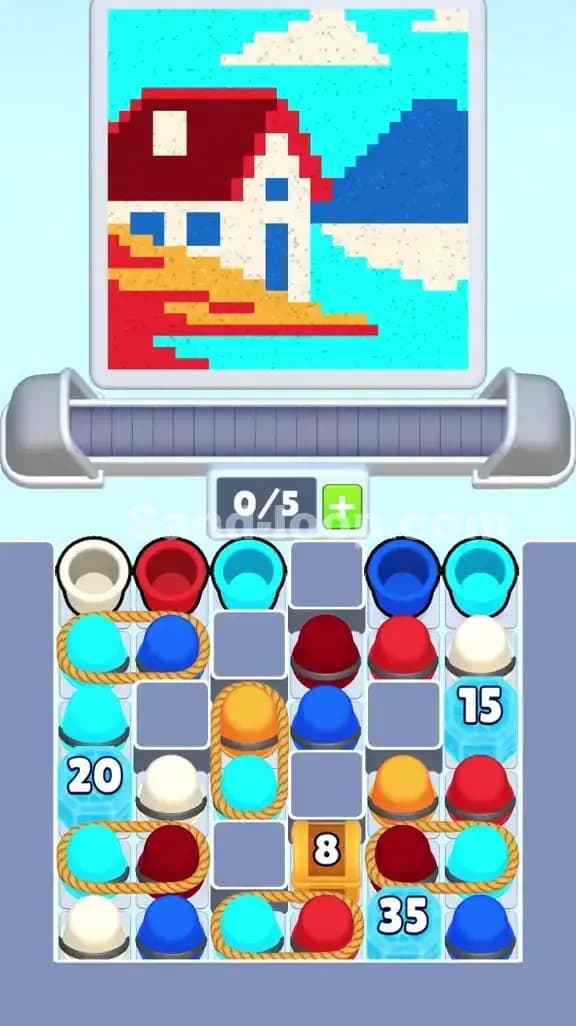
This level features a serene pixel art scene: a little white house with a red roof, sitting on an orange beach next to a blue mountain, all against a bright cyan sky. Don't let the peaceful vibe fool you. Sand Loop Level 353 is a logic level, specifically designed around rope-bound pairs and heavy ice blocks. You can't just speed through; you have to surgically remove specific colors to unlock the rest of the board.
The color palette is diverse: Red (roof), White (house walls/clouds), Dark Blue (windows/mountain), Orange (beach), and Cyan (sky/water).
Sand Loop Level 353 Solution: The House & Mountain
Take a close look at the top screen.
- Color Palette Deep Dive: We are juggling five distinct colors.
- Red: The roof and some detailing on the left.
- White: The main body of the house and the cloud wisps in the sky.
- Dark Blue: The mountain on the right and the house windows/door.
- Orange: The sandy beach foreground.
- Cyan: The large sky and water sections.
- The "Danger Zones": The biggest risk here is the White. The house walls need a lot of white sand, but the clouds in the sky need it too. If you burn all your white cups on the house early without clearing the ice blocks that hold more white cups, you'll get stuck waiting for a color you can't access. Also, the Orange beach is tricky because it sits right under the red roof sections—timing the switch between red and orange is tight.
- Fill Order Prediction: You generally want to paint the bottom-most layers first in Sand Loop logic, but here the Red Roof is prominent. However, the game forces your hand. You have to clear the ice blocks first. That means prioritizing Cyan and Dark Blue early to smash the ice, or Red if it's available, depending on which cups are "free" to move.
Tackling the Rope Bonds in Sand Loop Level 353
The specific obstacle defining Level 353 is the Rope Bond. You'll see multiple pairs of cups tied together with thick brown rope (e.g., a Cyan cup tied to a Dark Blue cup).
This is a massive restriction. When you tap one cup in a bonded pair, both cups move to the conveyor belt simultaneously. This instantly eats up 2 slots of your 5-slot capacity. If your conveyor is already carrying 4 cups, you physically cannot tap a rope pair; the game will block you.
This forces a rhythm: Clear, Tap Pair, Clear. You must empty the conveyor almost completely before launching a rope pair. If you try to weave single cups in between rope pairs, you will almost certainly hit the 5/5 capacity limit and deadlock the level.
Sand Loop Level 353 Step-by-Step Walkthrough
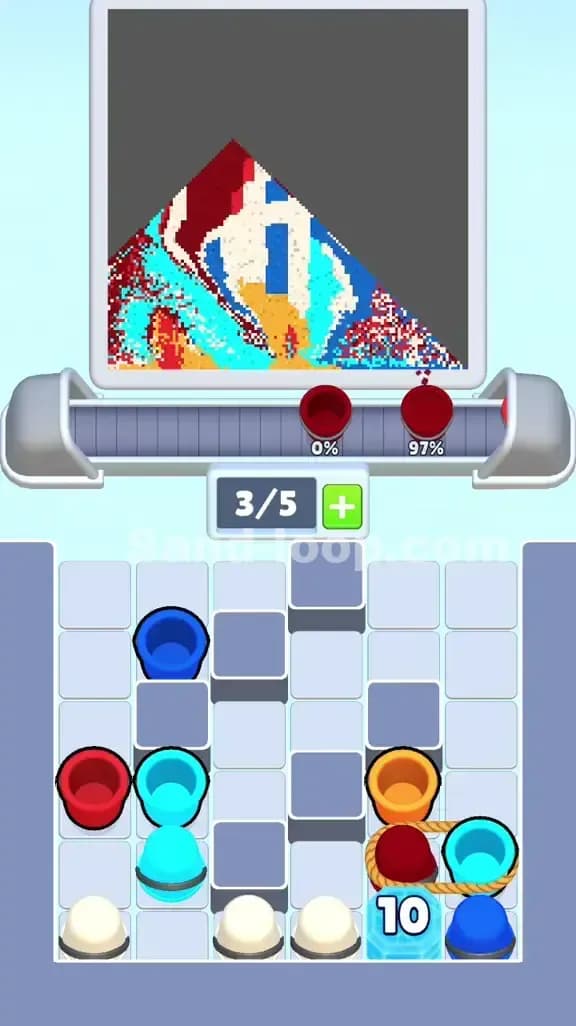
The board layout is dense. You have standard cups at the top, but the bottom is a mess of ice blocks (values 20, 15, 35) and a locked crate (value 8). Here is the dependency chain to survive.
1. Breaking the Top Layer
Your first moves are dictated by the top row. You have a White, Red, Cyan, Dark Blue, and Cyan available immediately.
- Start by tapping the single cups first to get the sand flowing. The single Cyan and Dark Blue cups are great openers.
- Do not tap the rope pair on the second row (Cyan + Dark Blue) until you have cleared at least two cups from the top row. You need that buffer space.
- Your goal right now is just to clear the "trash" covering the ice blocks. Don't worry about the art yet; just feed the colors as they appear.
2. Cracking the Ice Blocks (20, 15, 35)
Now the real work begins. You have three major ice blocks blocking valuable cups:
- Left (20): Blocks Cyan/White cups.
- Right (15): Blocks Red/White cups.
- Bottom Right (35): The big boss, blocking a Dark Blue cup.
Focus on the Right Ice Block (15) first if possible. It has the lowest number. Every time you successfully pour sand of any color, these numbers tick down. You want the 15 gone fast so you can access the White/Red cups underneath, which are crucial for the house.
- Tip: Use the Rope Pairs now. Since you cleared the top row, launch a pair (like the Cyan/Dark Blue on the left). It sends two cups at once, getting you two "points" of damage against the ice blocks faster than tapping singles.
3. The Crate (8) and the Orange Beach
In the bottom center, there is a wooden crate with an 8 on it. This requires 8 successful pours to unlock. Inside or behind this crate usually hides the Orange cups needed for the beach. You likely won't see many orange cups early on. This is intentional. The game prevents you from painting the beach until you've done the roof/sky.
- Once the crate pops, Orange cups will flood your options. Be careful! Don't spam them. The beach is a small part of the image. Paint it precisely. If you see the beach is full, stop sending orange cups immediately or they will contaminate your Dark Blue mountain.
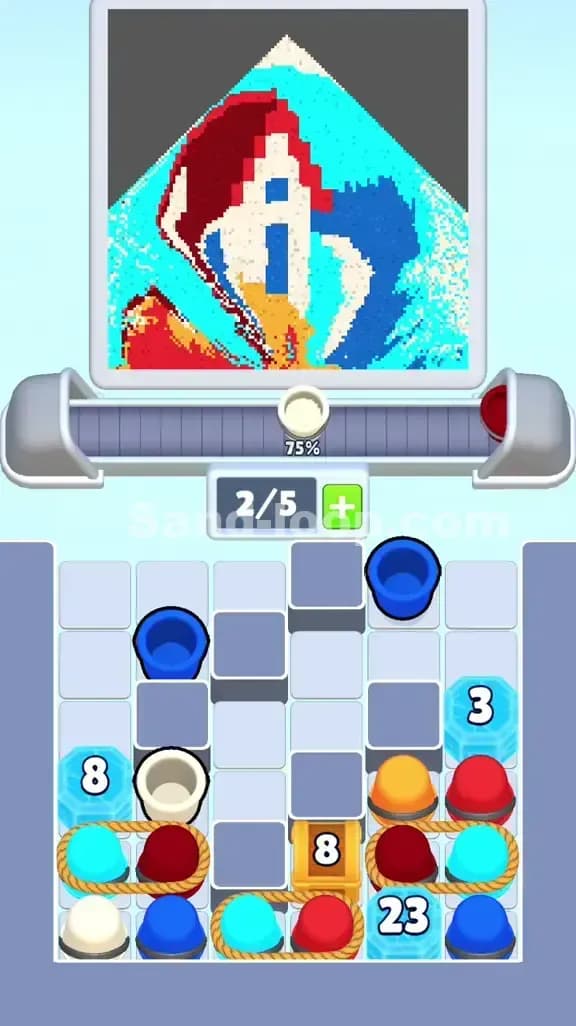
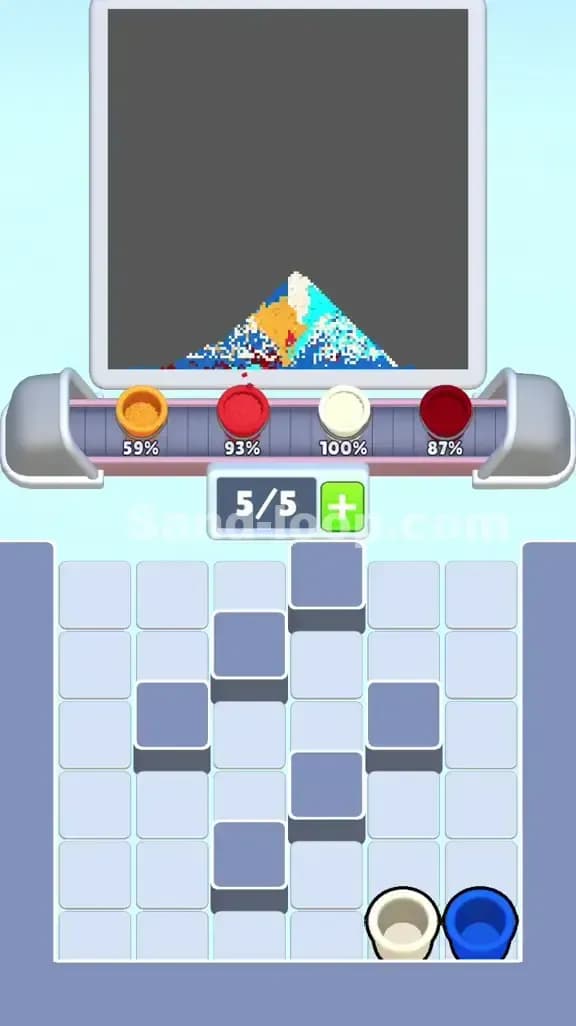
4. Finishing the Cyan Sky
By the end of the level, you'll likely have the house done but the Cyan Sky will still have gaps.
- The bottom-left and bottom-right corners often hide the last few Cyan cups.
- If you have a choice between a Cyan cup and a White cup near the end, check the clouds. If the clouds are done, prioritize Cyan.
- Warning: The Rope Bonds at the very bottom (often connecting a Cyan and a Red) can be annoying here. If you only need Cyan but are forced to take a Red along with it, make sure the Red has somewhere to go (like a missed spot on the roof), or else ensure you have an empty slot to let it pass through harmlessly without jamming the belt.