Sand Loop Level 165 Solution Walkthrough | Sand Loop 165
How to solve Sand Loop level 165? Get instant solution for Sand Loop 165 with our step by step solution & video walkthrough.
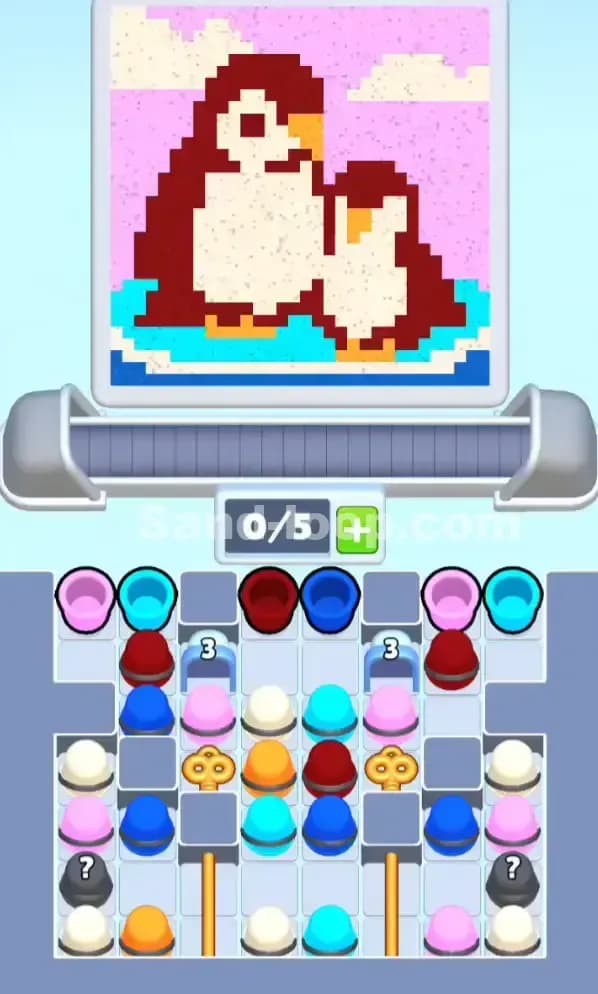

Sand Loop Level 165 Guide: The Penguin Pair Puzzle
Sand Loop Level 165 features a pixel art piece that is deceptively simple: a Parent and Child Penguin standing on an ice floe. While the image is cute, the puzzle layout is aggressive. This is a Key Unlocking Level. Your primary goal isn't just painting; it's digging through a cluttered inventory to find the keys that unlock the crucial colors needed for the final details.
The hook here is the scarcity of Orange cups. You need them for the beaks and feet, but they are locked behind golden bars at the very bottom of the tray. If you waste grid space early on, you won't be able to reach them in time.
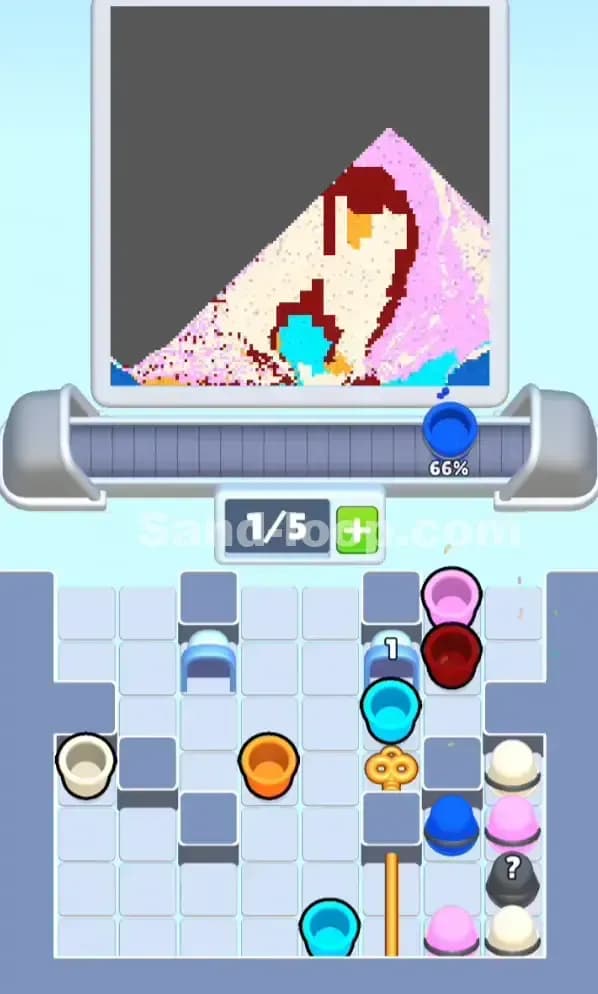
Sand Loop Level 165 Solution: The Penguin Art
The top screen reveals the target image. It’s a 5-color job, but the distribution is uneven.
- Dark Red / Maroon: This is the dominant color for the penguin bodies. You will need a lot of this early.
- Cream / White: Used for the bellies and faces.
- Pink: The background sky. This is a "filler" color you can pour while waiting for better cups.
- Cyan / Light Blue: The ice patch they are standing on.
- Orange: The smallest but most annoying requirement. Used only for the beaks and feet.
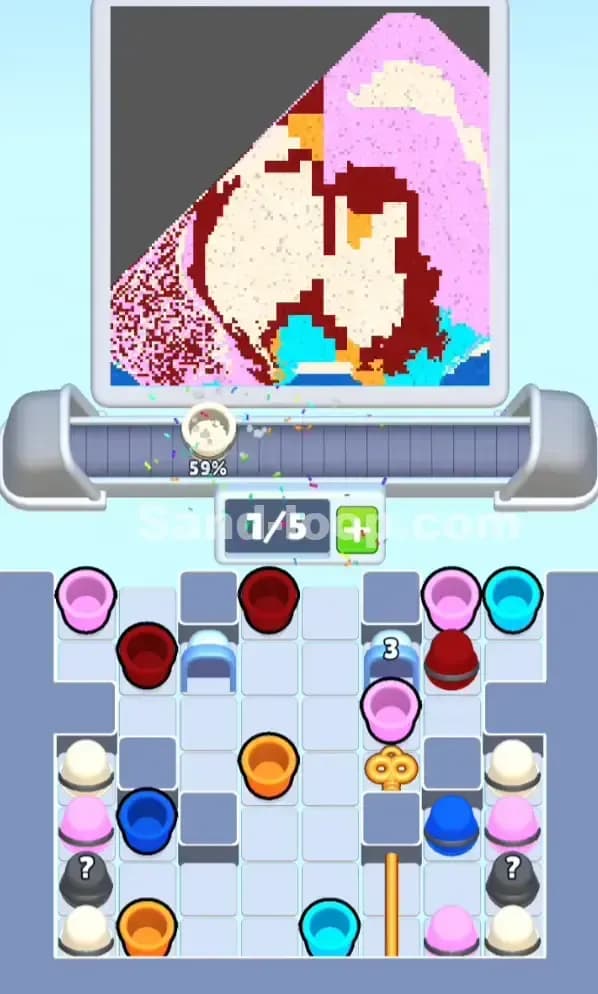
The "Danger Zones": The beaks. They are tiny, 1-2 pixel details. If you accidentally pour a Maroon or White cup while the nozzle is over the beak area, you will contaminate the art. The game is unforgiving here. Also, watch out for the Pink Sky vs. White Belly contrast. It's easy to zone out and pour Pink into the belly area because the colors look somewhat similar in the tray chaos.
Fill Order Prediction:
- Maroon (Bodies): Define the shapes first.
- Pink (Sky): Clear the easy background to free up conveyor space.
- White (Bellies): Fill the inside of the shapes.
- Cyan (Ice): Base of the image.
- Orange (Details): Save these for last or sneak them in whenever the nozzle aligns perfectly.
Tackling the "Buried Keys" in Sand Loop Level 165
The specific obstacle in Sand Loop Level 165 is the Double Key Lock.
Look at the tray. There are two Golden Keys sitting in the middle rows, but they are not accessible immediately. They are buried under layers of Blue and Red cups. Furthermore, the bottom two rows—containing your vital Orange and extra Cyan cups—are caged behind Golden Bars.
You cannot finish the penguin beaks without those bottom rows. This creates a strict dependency chain: Clear Top Layer -> Load Keys -> Unlock Bottom Layer -> Access Orange Cups.
If you focus too much on painting the sky (Pink) and ignore the cups blocking the keys, you will run out of conveyor slots (you only have 5) and deadlock the game.
Sand Loop Level 165 Step-by-Step Walkthrough
1. Cracking the "3" Ice Gates
Your first moves must be aggressive. You will see blue arches with the number '3' on them. These gates block the columns underneath them. To break them, you usually need to clear the cups directly inside or adjacent to them.
- Start by loading the top-most Pink and Dark Red cups. This starts painting the sky and the big penguin's back.
- Prioritize clearing the cups that are physically touching or inside the numbered gates. Every time you clear one, that number ticks down. Once it hits zero, the gate shatters, giving you more elbow room.
2. The Dig for Gold
Once the top layer thins out, you will expose the Golden Keys.
- Do not wait. As soon as a Key is unblocked, tap it.
- Keys do not take up "paint" time, but they do take up travel time on the belt. Get them moving.
- Tip: While the keys are traveling, you can safely pour Maroon or Pink. Just keep an eye on your slot capacity (the 0/5 counter). Keep at least 1 slot open so the key can actually enter the belt.
3. The Orange Cup Sprint
When the keys hit the end of the belt, the bottom golden bars will retract. This exposes the Orange cups and the Mystery Boxes (?) at the bottom corners.
- Now you must be precise. The conveyor moves constantly. Watch the nozzle position relative to the penguin beaks.
- Tap the Orange cup before the nozzle reaches the beak. Account for the lag. If the nozzle is already over the beak, it's too late.
- Use the Mystery Boxes cautiously. In Sand Loop 165, they often contain useful filler colors like White or Cyan, but don't count on them for the specific Orange pixels.
4. Cleaning up the Cyan Ice
By now, the main bodies should be done. You are likely left with the bottom of the canvas (the ice floe).
- Use the Cyan cups from the newly unlocked bottom row.
- Be careful not to pour Cyan over the penguin's Orange feet. The feet are at the very bottom, overlapping with the ice zone. Short, controlled bursts are better than a long continuous pour here.
Clear the ice, protect the feet, and the level is yours.