Sand Loop Level 175 Solution Walkthrough | Sand Loop 175
How to solve Sand Loop level 175? Get instant solution for Sand Loop 175 with our step by step solution & video walkthrough.
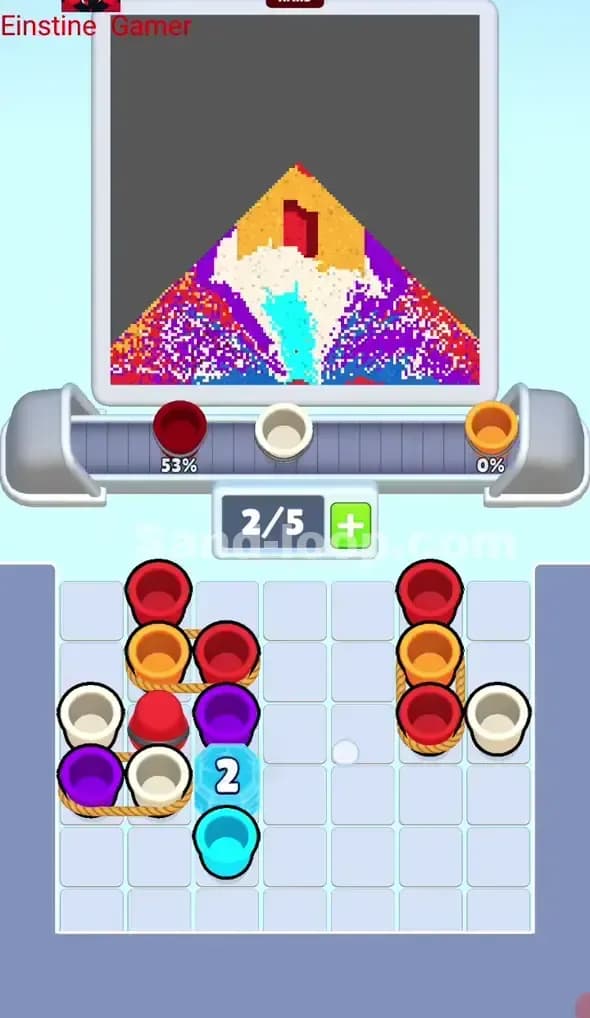

Sand Loop Level 175 Snapshot
The Goal Canvas
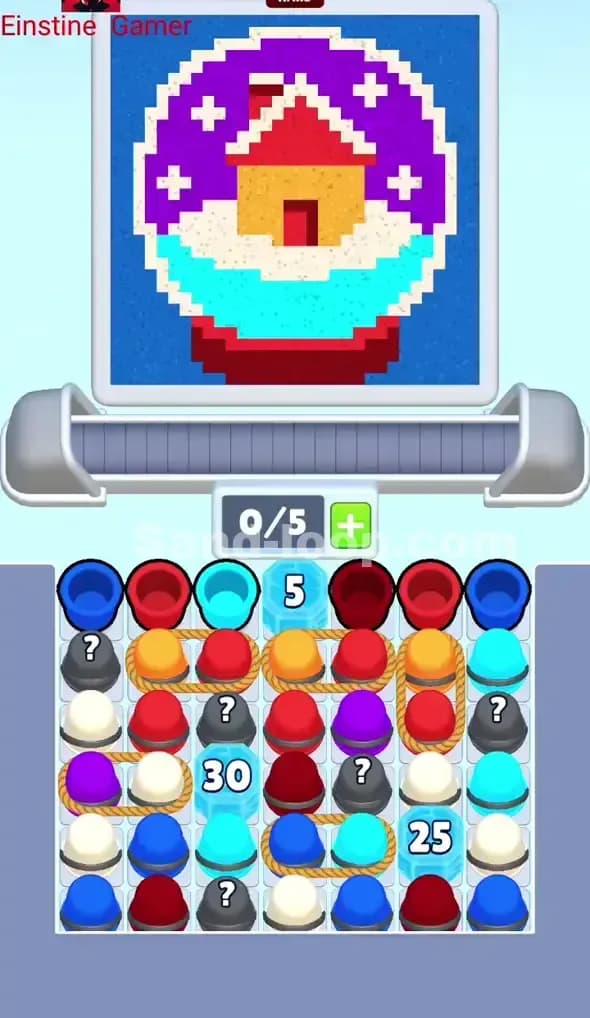
Sand Loop Level 175 tasks you with filling a charming pixel-art scene: a cozy snow-covered cottage with a red roof, yellow walls, and a burgundy door, all nestled in a snowy landscape beneath a deep blue sky and purple mountains. The canvas is dominated by the blue background, with significant regions demanding cyan (the snowy foreground), red (the roof and accents), purple (the mountains), cream/white (snow and cottage trim), orange/yellow (the walls), and dark red/maroon (the door and base). These aren't tiny accent zones—they're substantial color blocks that require careful pacing to fill without overshooting.
The Starting Setup
You'll begin Sand Loop Level 175 with a conveyor capacity of 0/5, meaning your belt is currently empty but can hold five cups maximum. The cup tray below is densely packed with a mixed array of colors: blues, reds, cyans, oranges, yellows, creams, and grays (mystery cups). Many cups are stacked two or three layers deep, and several mystery cups (marked with question marks) add uncertainty. Some of the colors you need immediately are buried beneath others, so unblocking them without jamming your belt slots is the real puzzle. The level offers a booster slot available (indicated by the green plus icon), but you won't need it if you plan efficiently.
The Win Condition
To beat Sand Loop Level 175, you must fill all the large color regions on the canvas to completion while respecting the slot economy and avoiding contamination. Every pour counts—waste a single cup on an already-full color, and you'll hemorrhage attempts. The mystery cups add risk; they could be a needed color or a game-breaking duplicate. Success means reaching 5/5 progress across all required colors through disciplined timing and strategic cup rotation.
Why Sand Loop 175 Feels Hard (The Actual Bottleneck)
The Real Puzzle: Tray Congestion and Unblocking Order
Sand Loop Level 175 isn't hard because the canvas is complex—it's hard because your supply tray is a tangled knot. The blues and reds you need early are trapped under cream, orange, and mystery cups. You can't just grab what you need; you have to unblock it. Load the wrong cup first, and you'll jam your five slots with useless colors while the ones you actually need remain buried. This creates a cascade failure: your conveyor fills with dead weight, you run out of room, and suddenly you're forced to waste pours or restart.
Three Classic Traps in Sand Loop Level 175
Trap One: Loading cream too early. Cream is abundant in the tray and easy to grab, but the canvas only needs a moderate amount. If you load three cream cups in your opening sequence, you'll max out that color before you've even touched purple, and then you're stuck cycling through useless pours while the canvas starves for other colors.
Trap Two: Not respecting the mystery cups. You've got at least three mystery cups visible in the tray. They could be valuable cyans or dark reds, or they could be duplicates of colors you've already overfilled. Don't pop them into the conveyor early just to free up tray space—that's exactly how one bad mystery cup derails your whole run.
Trap Three: Ignoring the slot economy. It's tempting to load the belt with six or seven cups to "stay ahead," but you only have five slots. Overfill your belt and you create a traffic jam. The conveyor keeps moving, but cups back up in the tray, blocking access to colors you need next. I choked Sand Loop Level 175 three times because I greedily filled all five slots and then realized I'd locked myself out of the red cups I needed for the roof.
Why It Looks Easy But Isn't
Sand Loop Level 175 looks straightforward on the surface: fill the picture with the right colors. The canvas itself is clear, the color regions are well-defined, and you can see all the cups you need. But the tray is a maze, and the conveyor lead time (your tap happens now, but the cup reaches the pour point two seconds later) means you're always playing one or two moves ahead. One miscalculation in the opening, and you'll spend your remaining attempts in damage-control mode.
Step-by-Step Walkthrough to Beat Sand Loop Level 175
Opening Rhythm: Establish the Foundation
Start Sand Loop Level 175 by tapping immediately for the two blue cups in the top row—they're unblocked and you'll need them to build the sky. Tap once, let the first blue cup roll toward the belt, and tap again for the second. Don't load a third cup yet. Wait for the first blue to reach the pour point and begin filling the background, then add one cyan cup to the belt. Cyan is your second-priority color (the snowy foreground takes up serious real estate), and keeping one cyan cycling in the first 10 seconds tells you how long the lead time is. You should have roughly 1–2 empty slots at all times during this phase. With blue and cyan moving, you've got space and breathing room.
Unblocking the Key Colors: Strategic Tray Navigation
Now comes the critical move. Look at your tray: the reds and dark reds are partially buried. You need them for the roof and door, but they're not immediately accessible. Your strategy is to load one cream cup (just one) to clear a path to the reds underneath. Pour that single cream to top off the snow background, then immediately load a red. The burgundy reds should become available once you've moved a couple of cups. If a mystery cup is blocking your red, don't tap it yet—circle back to it. Load the red, let it roll toward the belt, and once it's on the conveyor, you've unlocked the unblocking pattern: you're no longer chasing buried colors; the tray is now responsive.
Mid-Game Control: The Rhythm and Gap Strategy
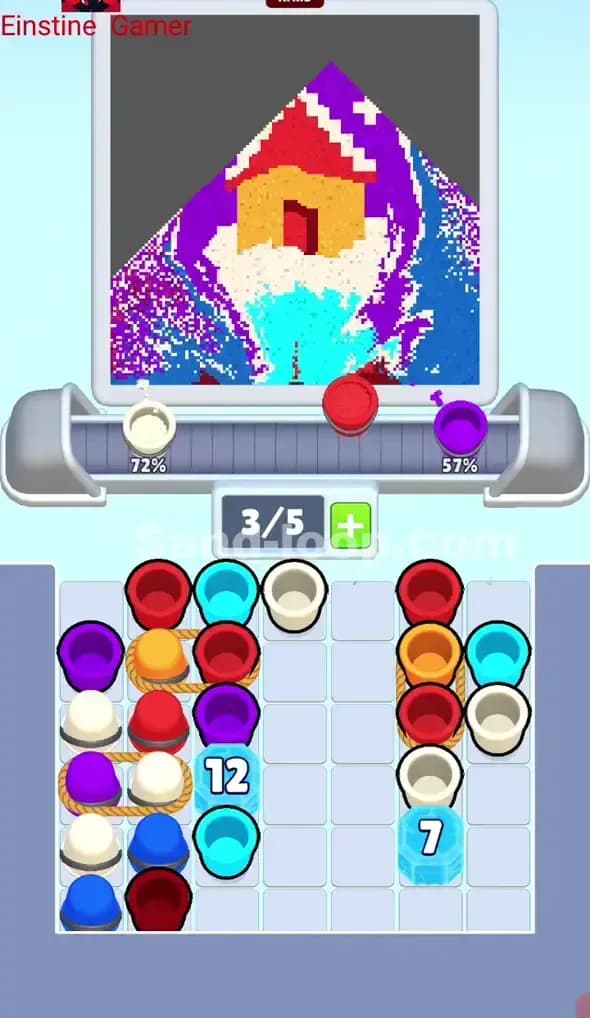
Once you're into Sand Loop Level 175's middle phase, you've got blue, cyan, red, and cream cycling. Now introduce purple. Purple is the mountains—a large region—so you'll need multiple cups. Tap for a purple from the tray, load it, and keep your belt at 3–4 cups as it cycles. This is where the lead-time rhythm matters: if you tap for a purple now, it won't hit the canvas for another 2–3 seconds. Use those seconds to observe the color progress bars. Is blue filling too fast? Let a blue cup sit on the belt without pouring; just let it cycle back to the tray and reload it later. The conveyor doesn't force you to pour every cup immediately—use gaps strategically. If cyan is lagging, prioritize the next cyan cup and eliminate a cream cup from your queue. The belt should never feel chaotic; it should feel like you're conducting a slow, deliberate orchestra.
End-Game Precision: The Final 10–20%
As you approach Sand Loop Level 175's finish line, your color bars will show which regions need just a little more love. Orange (the cottage walls) and purple (mountains) are likely still climbing. Dark red (the door and base) might be nearly full. Here's where patience pays off: slow down. Load one cup at a time, let it pour, watch the progress bar, and only tap for the next cup once the current one is safely gone from the belt. If you've got one mystery cup left in the tray and your colors are at 90% complete, don't tap it yet. Wait until you've identified exactly which color you need, then take the risk. In the final stretch, a single wasted pour can cost you the level.
If You Mess Up: Recovery Tactics
Scenario A: You've overfilled blue (it's maxed out at 100%), but you've still got two blue cups on the belt rolling toward the canvas. Solution: do nothing. Let them pour and waste. It stings, but it's faster than restarting. Your other colors are still climbing, and wasted pours on a full color don't reset your progress—they just don't add anything.
Scenario B: You loaded a mystery cup and it turned out to be a cream duplicate. The canvas is already cream-heavy, and now you're blocked. Solution: immediately shift your belt focus. Load the colors you're behind on (purple, cyan, dark red) and cycle through them rapidly. You'll make back the progress faster than you think.
Scenario C: Your belt jammed mid-game (five cups sitting idle because you loaded wrong colors), and the colors you need are now buried. Solution: if you're early enough, restart. If you're past halfway, accept the situation and pivot: load the most critical remaining color and ride it to the end, even if it's not optimal.
Why This Strategy Works in Sand Loop Level 175
Conveyor Lead Time + Slot Economy = No Deadlock
This strategy succeeds in Sand Loop Level 175 because it respects the two fundamental rules of the game. First, it acknowledges that your tap happens now, but the cup arrives at the canvas two seconds later. By planning one or two cups ahead, you're never caught off-guard by an unexpectedly full color or a needed color that's suddenly out of room. Second, it keeps your belt at 3–4 cups, never more than 4. Why? Because five cups on a five-slot belt with one incoming cup creates congestion. With one or two empty slots, you always have flexibility to load a high-priority cup or pause to let a low-priority cup cycle away. You never deadlock.
Controlled Waste and the "Background Overfill" Trap
The background (blue and cream) is enormous in Sand Loop Level 175, and it's easy to overfill it before you've even started on the roof and door. This strategy inoculates you against that by being deliberate with cream. You load exactly one cream cup early to unblock the reds, and then you ignore cream for the rest of the level. The background fills naturally as blue and cyan cycle—cream is just a bonus. Meanwhile, your focus stays on the mid-priority colors (red, purple, dark red, orange) that actually determine whether you win. You avoid the classic trap of maxing out one color at 40% completion while three other colors sit at 10%.
Consistency and Attempt Efficiency
If you're grinding Sand Loop Level 175 and you've got limited attempts, this plan keeps your runs predictable. The opening is always the same: blue, blue, cyan, cream, red, purple, then dynamic adjustments based on the progress bars. There's no improvisation in the first 10 seconds, so you're not wasting brain power on whether to load a blue or a red. You know. That conserved mental energy is available for the critical mid-game decisions: which color to prioritize next, when to tap for a mystery cup, and how to handle unexpected tray blockages. Consistent runs mean you'll eventually line everything up perfectly.
Extra Tips and Adaptations for Levels Like Sand Loop Level 175
Six Specific Mistakes and Fixes
-
Mistake: Loading three cups at once to "get ahead."
Fix: Load one, let it roll, load the next. Stagger your taps. You'll maintain belt control and avoid congestion. -
Mistake: Immediately tapping every mystery cup you see.
Fix: Treat mystery cups as your last resort. Only tap one if you've identified a color you're behind on and the tray is otherwise too blocked. -
Mistake: Ignoring the color progress bars until the very end.
Fix: Glance at the bars every 5–10 seconds. If blue is at 70% and cyan is at 30%, load cyan next, even if it's slightly buried. -
Mistake: Pouring continuously without pauses.
Fix: Pause deliberately. Let a cup sit on the belt for a rotation if you need breathing room. The belt doesn't punish you for hesitation. -
Mistake: Assuming all cups of one color are equally accessible.
Fix: In Sand Loop Level 175, some reds are in the top layer and some are buried three deep. Grab the accessible ones first, and use the unblocked colors to clear a path to the deeper ones. -
Mistake: Tapping for a color you think you need without checking if it's actually the blocking cup.
Fix: Before you tap, scan the tray. If a cream cup is sitting on top of a red cup, grab the cream first—it unblocks the red and gives you options.
Boosters: When to Deploy Them
In Sand Loop Level 175, you've got one booster slot available (the green plus icon). You don't need it if you follow this plan, but here's when it becomes useful: if you've made a significant mistake in the first 20 seconds and your belt is jammed with the wrong colors, use the extra slot to load a high-priority color while the wrong colors cycle out. Alternatively, if a mystery cup turned out to be useless and you're now one color short with only five cups left in the tray, the extra slot gives you a safety valve. Don't tap it preventatively—deploy it only when you're in a genuine bind.
Final Encouragement
Sand Loop Level 175 is a confidence-builder. Once you beat it, you've mastered the core rhythm of Sand Loop: tray navigation, conveyor timing, slot economy, and color priority. The next time you hit a similarly dense level, you'll recognize the pattern immediately. If you're stuck after a few attempts, take a 10-minute break, reset your focus on the opening sequence (blue, blue, cyan, cream, red), and return fresh. The puzzle is solvable, and it's genuinely satisfying when it clicks. For more tips, advanced strategies, and video walkthroughs for Sand Loop Level 175 and similar challenges, visit sand-loop.com—the community there is incredibly helpful and always ready to share solutions.

