Sand Loop Level 177 Solution Walkthrough | Sand Loop 177
How to solve Sand Loop level 177? Get instant solution for Sand Loop 177 with our step by step solution & video walkthrough.
Sand Loop Level 177 Snapshot
The Canvas and Color Goal
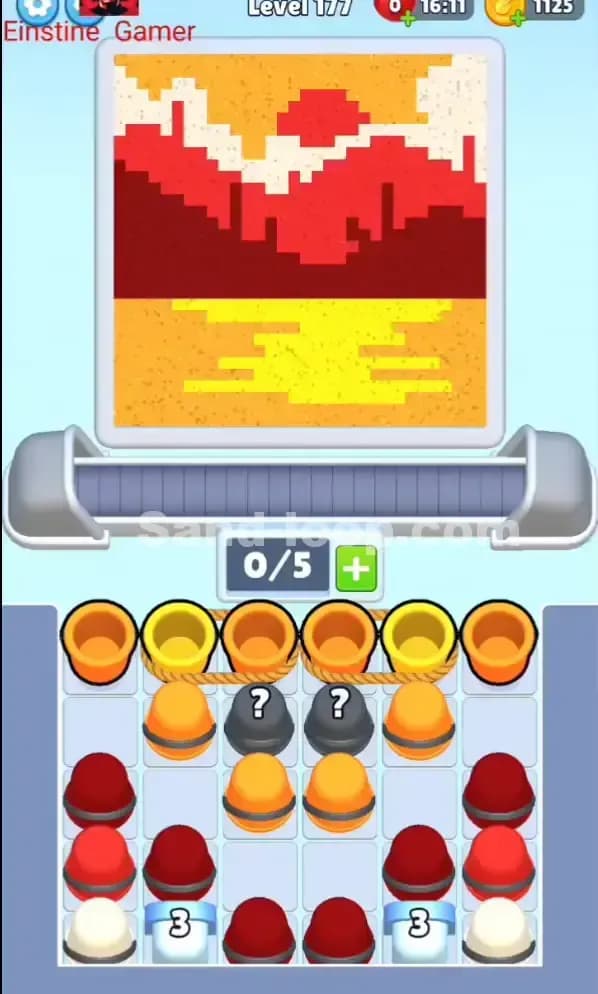
Sand Loop Level 177 presents a stunning landscape split into four distinct regions. The top third is a golden-yellow sky with orange accents, the upper-middle shows bright red and deep burgundy mountain peaks, a narrow dark burgundy band marks the ridge line, and the bottom half demands bright yellow foreground detail scattered across an orange base. You're looking at a four-color puzzle: golden yellow, bright red, deep burgundy (or maroon), and lime yellow. The progress meters show you exactly how much of each color you need—this isn't a guessing game, it's a precision fill.
Starting Setup and Constraints
You begin Sand Loop Level 177 with a conveyor belt showing 0/5 capacity, meaning five slots are available and all are empty. This is actually a blessing—you've got room to breathe. Your supply tray below contains six orange/yellow cups visible at the top tier (arranged in pairs), two mystery black cups in the center (which often lock or block access), and six red/burgundy cups lower down (three on each side, some partially stacked). The tray layout tells you immediately that red cups are "expensive" to reach—they're trapped beneath or beside blocking pieces. You'll need to unblock strategically rather than panic-loading every red cup at once.
Win Condition
Complete Sand Loop Level 177 by filling all four color zones to their target thresholds without overflow, wasted pours, or contamination. The key constraint? Your conveyor maxes at five cups, and wrong-color pouring locks you into waste cycles. You need clean timing, deliberate gaps, and a rock-solid order of operations.
Why Sand Loop 177 Feels Hard (The Actual Bottleneck)
The Real Puzzle: Unblocking Red Without Jamming Slots
The single biggest bottleneck in Sand Loop Level 177 is accessing the red and burgundy cups buried in the lower tray without stalling your belt. You've got plenty of yellow cups available upfront, which feels easy—and that's the trap. If you load four yellow cups back-to-back, your conveyor fills quickly. Meanwhile, the red cups sit locked behind blocking pieces or stacked in ways that require you to remove intermediate cups first. By the time you want red, you're either gridlocked (belt full of yellows waiting to pour) or you've already overfed the yellow zones and wasted precious moves.
Three Classic Traps in Sand Loop Level 177
Trap 1: The Yellow Overflow. Yellow is plentiful and easy to grab. Many players load yellow, yellow, yellow, then realize they've pumped 60% of the canvas with yellow before the reds even reach the belt. Once you overshoot yellow, you can't undo it—the level is basically lost.
Trap 2: Black Cup Mystery. Those two central black cups in the tray are often "blockers" or "dummy" pieces that serve no pouring function. If you accidentally grab one thinking it's a real cup, you've wasted a belt slot and created a dead cup that cycles uselessly while you wait for the belt to clear. Always identify cup colors before you load.
Trap 3: Stacking and Depth. The red cups are stacked and overlapped in the tray. Pulling one red cup doesn't automatically expose the next—you might need to move a yellow cup out of the way first, which sounds inefficient but is actually part of the intended solution path. Skip this step, and you'll find yourself tapping red cups that aren't yet "available," leading to failed taps and wasted time.
Why It Looks Easy But Isn't
I choked the first two runs here because I saw the conveyor belt was empty and thought, "Oh, just load cups and pour." Wrong. Sand Loop Level 177 is a sequencing puzzle disguised as a pouring puzzle. You're not just managing liquid; you're managing which physical cups you can access and in what order, all while the conveyor ticks forward with hidden lead time. That delay between your tap and the cup's arrival at the pour point—it's lethal if you're not counting beats.
Step-by-Step Walkthrough to Beat Sand Loop Level 177
Opening Rhythm: Load Smart, Keep Slots Free
Start by loading exactly two yellow cups in quick succession. Tap the topmost yellow cups (the easy ones at the tray's upper tier) and load them onto the belt. This gives you your first two pours and keeps three slots free—that buffer matters. Don't load a third yellow yet. Instead, pause for about two seconds. You want the first two yellows to travel down the conveyor toward the pour point while you scout your next move in the tray.
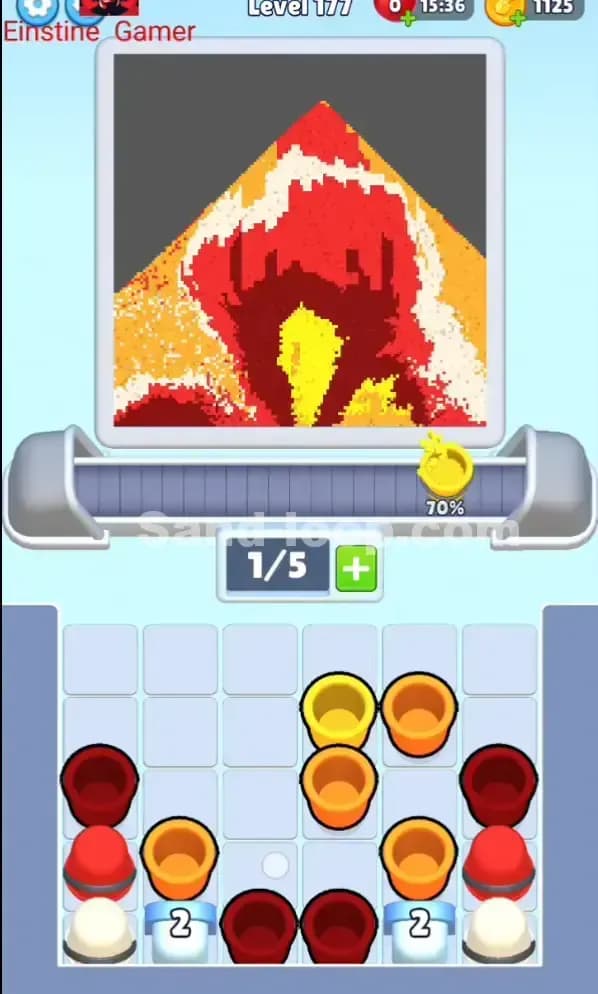
Why two? Because Sand Loop Level 177's pour dispenser has a rhythm. After two cups have passed through and poured, you'll have a visual cue—you'll see the yellow meter climb slightly. That cue tells you the belt is actually moving and cups are progressing. Now you can load a red cup without fear of it being blocked.
Unblocking Plan: Free Red Without Deadlock
Examine the red and burgundy cups carefully. You'll notice that some red cups on the left and right edges are accessible right now, but others in the center or lower tier are stacked under or beside the mystery black cups or partially buried. Here's the safe unblock sequence for Sand Loop Level 177:
- Load your first red cup (grab from the outer edges—left or right side, whichever red is most obviously accessible). Place it on the belt as your third cup.
- Immediately load a second red cup from the opposite side. Your belt now has: yellow, yellow, red, red, and one empty slot.
- Do not load a fifth cup yet. Wait. The yellow cups are now at or near the pour point. Let them pour. Your belt clears to three cups (red, red, empty, empty, empty), and the black blockers or stacked reds suddenly have visual breathing room in your tray view.
- Now load your yellow cup number three (you still need yellow progress for the bottom zones). Slot it in. Belt is now: red, red, yellow, empty, empty.
- Load a burgundy cup (the deep maroon color—grab one from the middle-lower tray, now that space has opened). Belt fills to: red, red, yellow, burgundy, empty.
By cycling through colors and respecting the "load two, watch them pour, load two more" rhythm, you avoid the clogged-belt scenario and naturally unblock your tray.
Mid-Game Control: Cycle and Maintain Gaps
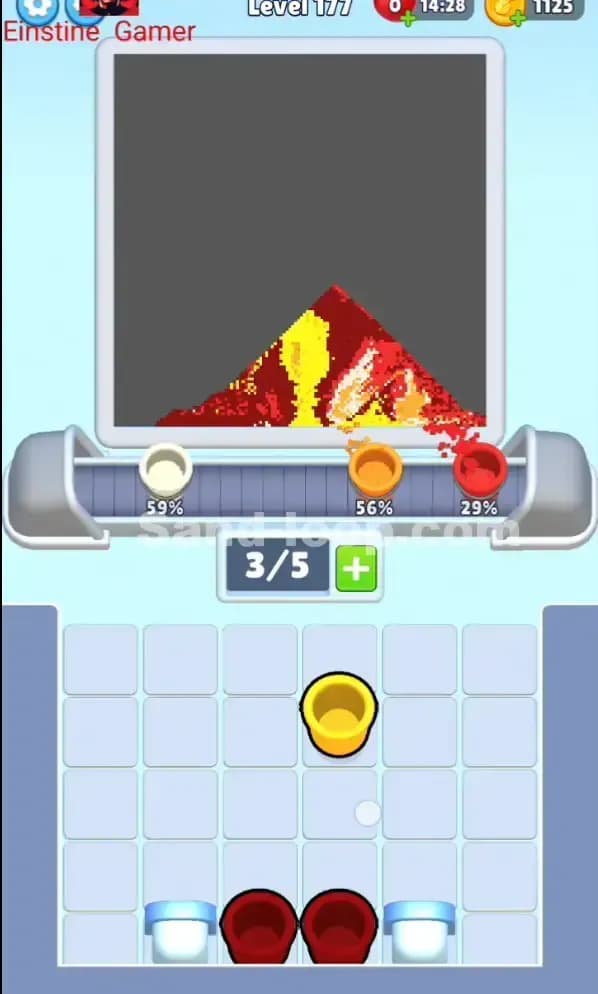
Once you've cleared the opening (roughly 20–30% of the level filled), Sand Loop Level 177 enters its rhythm phase. Your job now is constant light management:
- Load cups in pairs of the same color when the belt has room.
- After each pair pours, check your color meters. Whichever color is lowest gets priority next.
- Keep at least one empty slot on the belt at all times. This isn't paranoia—it's your escape hatch. If you misload a cup or realize you need to pivot colors, an empty slot lets you "reset" without losing an entire cycle.
- Watch the progress bars obsessively. If red is at 60% but yellow is at 30%, lean into yellow, even if red feels "more urgent."
You'll spend roughly 6–10 minutes here cycling yellow, red, and burgundy in measured bursts. It's meditative if you're patient, maddening if you rush.
End-Game Precision: The Final 10–20%
As you approach 80–90% completion in Sand Loop Level 177, the color meters get very close to their targets. One extra pour might max a color. Now you're playing a different game: math and single-cup loads.
Instead of loading pairs, load one cup at a time. Watch the meter climb. If red is at 95% and you've got one red cup loaded, watch it pour. If the meter hits 100% mid-pour, that's perfect—you've filled it exactly. If you load a second red thinking you're fine, and the meter was already at 98%, congratulations, you've wasted a cup and potentially locked yourself out of yellow or burgundy.
In the final stretch of Sand Loop Level 177, slow down. Tap once, watch the pour, wait one second, assess, then tap again. I know it's frustrating to move slowly after 10 minutes of rhythm, but this is where most runs die.
If You Mess Up: Quick Recovery Tactics
Scenario A: You overfed yellow early. Yellow is at 110%, you're locked out. Recovery: Shift all focus to red and burgundy. Load only those colors and accept that yellow has "wasted" room. You might still win if red and burgundy fill perfectly—the over-yellow just means less precision is available.
Scenario B: You grabbed a black dummy cup and it's clogging your belt. Don't panic. Let it cycle through. A dummy cup will "pour" invisibly (no color meter change) and clear the belt. You've lost one cycle, but you're not stuck forever.
Scenario C: You loaded the wrong color and it's heading toward the pour point with three seconds to go. Too late to stop it in this game. Acknowledge it, plan your next two cups to compensate, and move on. Chasing one mistake with two more mistakes is how runs collapse.
Why This Strategy Works in Sand Loop Level 177
Conveyor Lead Time and Slot Economy
Sand Loop Level 177 operates on a ~2-second lead time between your tap and the cup's pour. By loading in pairs and respecting the empty-slot buffer, you "feel" that lead time instead of fighting it. The belt becomes predictable: load yellow, yellow → pour → load red, red → pour. This rhythm means you're never guessing where your cups are or wondering if you've overfilled a zone. You see each color pour before you load the next color.
The slot economy (keeping 1–2 empty slots) prevents the catastrophic "deadlock" where all five slots are full and you're waiting for cups to clear while the level timer ticks and you're forced to watch. Instead, you maintain agency. Empty slots = control.
Preventing Overshoot and Contamination
By monitoring color meters constantly and loading only what the meters need, Sand Loop Level 177 becomes a supply-chain problem, not a timing nightmare. You're not accidentally pouring "a little extra red" because you already committed to it; you're making active decisions about how much of each color the canvas needs right now. This eliminates the most common loss condition: overfilling the background color so badly that the puzzle becomes mathematically unwinnable.
Consistency and Repeatability
This step-by-step approach is reproducible. You'll beat Sand Loop Level 177 once using this plan, and you'll beat it again if you play it three more times. There's no randomness, no luck—just careful sequencing. You're not trying to "clutch" a win; you're executing a plan.
Extra Tips and Adaptations for Levels Like Sand Loop Level 177
Six Specific Mistakes and Fixes
Mistake 1: Loading three yellow cups in a row because they're easy. Fix: Limit yourself to two yellow cups, then reassess. "Easy" cups are often a trap in Sand Loop Level 177.
Mistake 2: Ignoring the mystery black cups and trying to load a cup behind them. Fix: Black/dummy cups block access. Move them out of the way by loading a "sacrificial" yellow cup first, clearing visual space, then access the color you actually need.
Mistake 3: Pouring continuously without gaps, trying to "speed up" the level. Fix: Continuous pouring leads to overshoot. Load, pour, pause, reassess. Breaks are your friend in Sand Loop Level 177.
Mistake 4: Watching the timer instead of the color meters. Fix: The timer is irrelevant. The color meters are everything. Focus on them and ignore the clock ticking down.
Mistake 5: Loading all six cups visible in the tray without considering stacking. Fix: Some cups are stacked behind others. You might tap a cup that isn't visually "available" yet. Always verify a cup is free before loading it in Sand Loop Level 177.
Mistake 6: Panicking after a single overfill and resetting. Fix: One overfilled color is recoverable. Keep playing. Only reset if two colors are maxed before the others are filled.
Boosters and Special Items
If your version of Sand Loop Level 177 includes boosters, here's when to use them:
- Extra Slot Booster: Deploy this in the final 15% if you're juggling three colors simultaneously and running out of belt space. Don't waste it early.
- Slow Belt / Extended Lead Time: Useful if you keep messing up the pour timing. Activate it for the final 20% to give yourself more reaction time.
- Undo / Swap Order: These are nuclear options. Use them only if you've made a critical error (like loading two blacks in a row) and you're certain one undo will fix it. In Sand Loop Level 177, most mistakes can be recovered without boosters—use them sparingly.
Closing Encouragement
Sand Loop Level 177 will click once you've done it once. It's not unbeatable; it's just a level that respects slow, deliberate play over panic and speed. You've got this. If you get stuck after a few more attempts, visit sand-loop.com for video solutions and community strategies—sometimes seeing the conveyor in motion is the final piece you need.