Sand Loop Level 179 Solution Walkthrough | Sand Loop 179
How to solve Sand Loop level 179? Get instant solution for Sand Loop 179 with our step by step solution & video walkthrough.

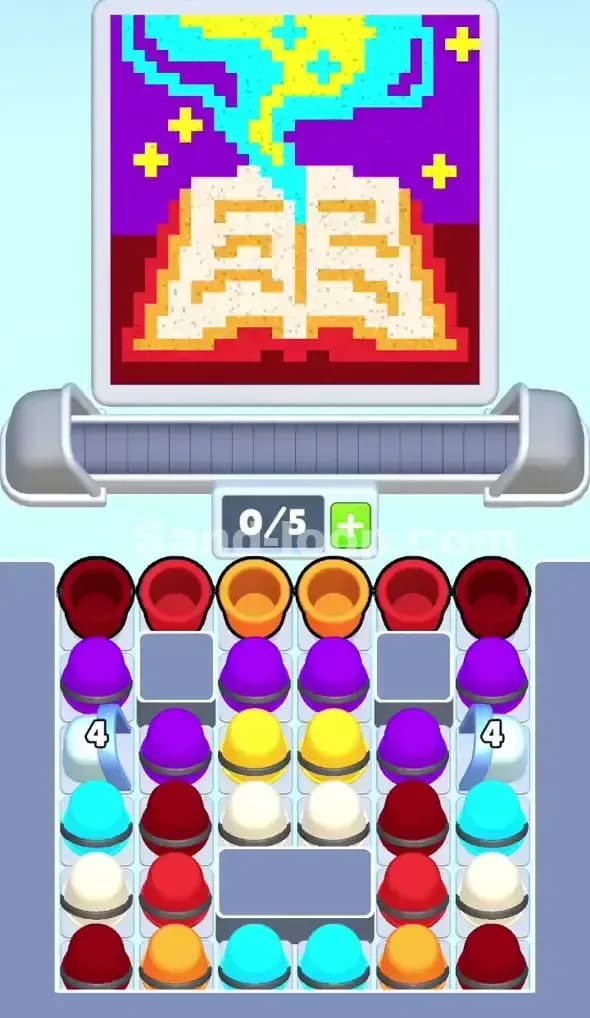
Sand Loop Level 179 Snapshot
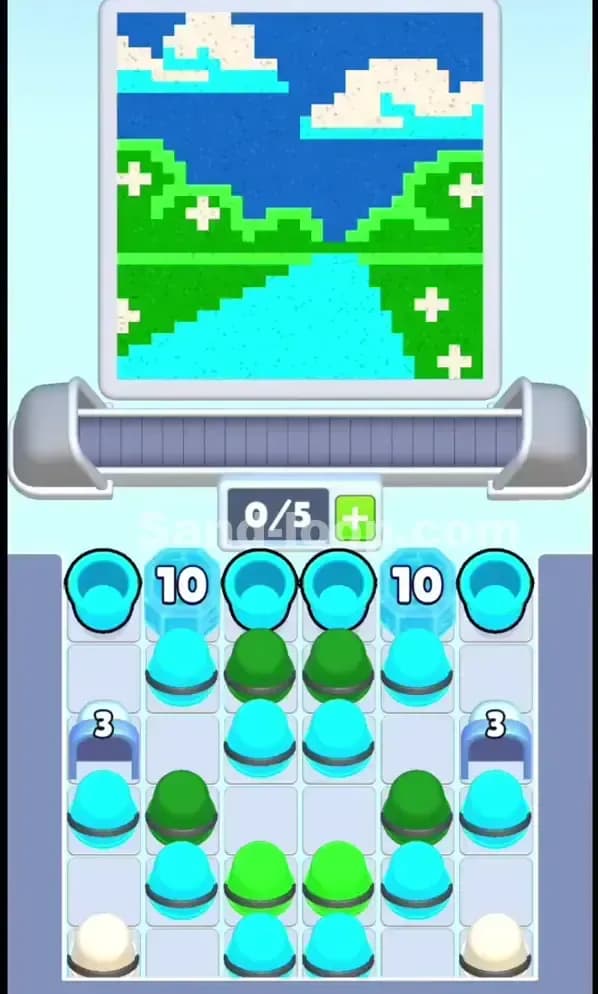
The Goal Canvas and Color Targets
Sand Loop Level 179 drops you into a scenic landscape puzzle: a bright blue sky dominates the upper third, with fluffy cyan clouds and a clear cyan water feature (river or lake) running through the middle-lower section. The landscape is framed by vibrant lime green hillsides with white flower accents scattered across them. This is a three-color level—blue (sky), cyan (water and clouds), and green (grass and hills)—and you'll need to fill each region precisely without overshooting. The color progress meters at the top tell you exactly how much of each hue you need; running over wastes pours and blocks your path to victory.
Your Starting Setup
You're looking at a 0/5 conveyor capacity, meaning the belt is empty and waiting. Your tray below is densely stacked with cyan and green cups in a strategic arrangement. You've got cyan cups ranked 10, 10, 3, and 3 on the outer edges and center, plus green cups (also ranked 10 and 10 in the middle) wedged between them. There are also cream/white cups at the very edges—these are blocked and not immediately usable, so don't waste mental energy on them yet. The puzzle demands you load and unload cups in a deliberate rhythm, respecting the fact that you only have 5 slots on the belt at any moment.
Win Condition for Sand Loop 179
Your mission is straightforward: fill the canvas to match the cyan, green, and blue targets without overflow or contamination. You'll cycle cups through the conveyor, timing each pour so sand lands in the right colored zone. The 0/5 slot economy means you need to empty the belt regularly (by completing pours) to avoid jamming. One mistake—like loading a second green cup while the first is still pouring, or letting cyan oversaturate—and you'll lock yourself into a losing position. Sand Loop Level 179 is possible on your first try if you respect the timing and cup order from the start.
Why Sand Loop 179 Feels Hard (The Actual Bottleneck)
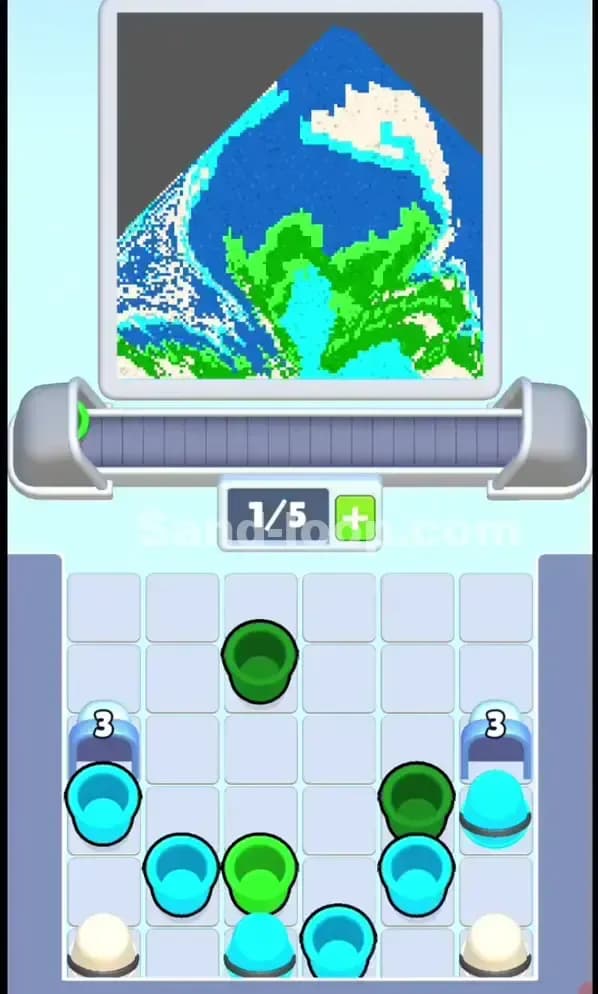
The Real Puzzle: Unblocking Green in the Right Order
Here's the trap: the two green cups (ranked 10 each) are sitting dead center in your tray, blocked above and below by cyan cups. You cannot grab a green cup without first clearing the cyan cups that sit directly on top of them. Sounds easy, right? It isn't. If you load both cyan 10s too early and let them sit on the belt while pouring, you'll run out of slot space before you can deploy the first green. The bottleneck is sequencing—knowing exactly which cyan to load, when to pour it, and when to free up a slot for the buried green cups. Load them wrong, and you'll find yourself with a full belt (5/5) and no way to progress.
Classic Sand Loop 179 Traps
The first trap is oversaturating cyan too early. Because cyan appears both as clouds and water in roughly equal visual weight, your instinct screams "pour cyan first!" Instead, if you dump both rank-10 cyan cups before touching any green, you'll overshoot the cyan meter and waste precious pours on unwanted blue to compensate. I've choked this level twice by greedily loading cyan.10, cyan.10 back-to-back without thinking.
The second trap is ignoring the slot economy. You see 5/5 on the belt and think "I've got time," but the conveyor has a fixed lead time between tap and actual pour. Tap a cup to pour when you're at 4/5 capacity, and by the time that cup reaches the dispenser, you're already stuck—you've loaded a fifth cup, and now you can't load anything new until one completes. That delay will kill you in Sand Loop 179.
The third trap is the cream cups at the edges. They look useless, and they are—don't load them. But their presence can psychologically make you think you have more options than you actually do.
Why It Looks Easy But Isn't
Sand Loop Level 179 looks like a straightforward "three colors, three cup types" puzzle. In reality, it's a rhythm game disguised as a fill puzzle. The canvas is deceptively generous—you've got room to paint each color comfortably. But the tray geometry forces you to make hard sequencing choices now that won't pay off until later. You'll make a decision in move 3 that doesn't feel right until move 10, and by then, if you chose wrong, it's too late.
Step-by-Step Walkthrough to Beat Sand Loop 179
Opening Rhythm: Load Cyan First, But Carefully
Start by loading one cyan 10-cup (either from the left or right outer position—doesn't matter). Tap it to pour when it reaches the dispenser. While that cup is in transit, load one of the 3-ranked cyan cups from the bottom. This gives you a mixed-size rhythm early and keeps your conveyor under 2/5, leaving plenty of buffer. Don't panic and load both cyan 10s immediately; that's where I see players fail.
The goal of your first two cycles is to fill the cyan zones (water feature and clouds) to about 50–60% while keeping the green meter untouched. Use the two 3-ranked cyan cups as "spacers" later—they're your safety valve if you over-tap and need light pours.
Unblocking Plan: Green Cups Freed in Stages
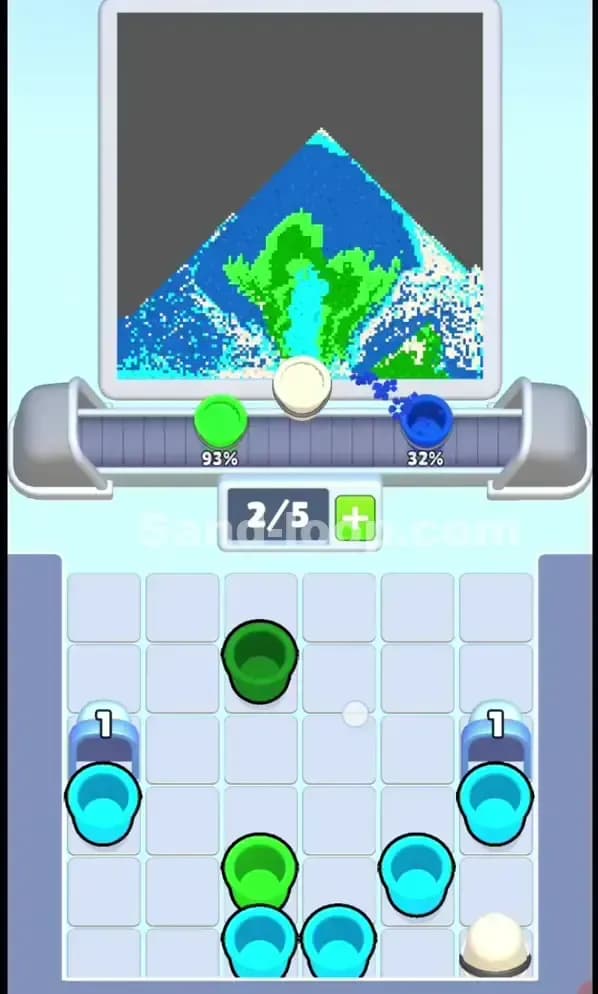
Once you've burned through one or both cyan 10s and one cyan 3, the green 10-cups will be partially exposed. Now—and only now—load your first green 10-cup onto the belt. Tap it to pour when the belt is at 1–2/5, giving you headroom if you need to abort or adjust. Watch the green meter climb; aim for 40–50% fill with this first pour.
After the first green 10 pours and empties, immediately load the second green 10. This is not the time to second-guess yourself. The second green pour should push you toward 80–90% on the green target, assuming the canvas has adequate green coverage. If you're worried about overshoot, here's the trick: use the cyan 3-cups as damage control. If green is climbing too fast, load a cyan 3-cup next and pour it to the cyan zones, buying yourself a move without advancing green.
Mid-Game Control: Cycling and Maintaining Gaps
By the mid-game (around move 8–12), your belt rhythm should be: load → pour → empty slot → load → pour → empty. Never load more than one new cup per cycle unless you're certain the previous cup is already pouring. This sounds slow, but it's the only way to avoid jamming at 5/5.
Keep at least one free slot at all times until you're in the final three moves. This buffer prevents the catastrophic "can't load, can't pour, game over" deadlock.
Watch your color meters obsessively. If cyan is at 80% and green is at 60%, your next move should be to load and pour one more green—not another cyan. Conversely, if green is at 95% and cyan is at 70%, load a cyan 3-cup and pour to the sky or water until cyan catches up.
End-Game Precision: Finishing the Last 10–20%
By the final moves, your belt will have only cream/white cups left, plus maybe one or two remaining colored cups. Here's where timing matters most. If you're at 90% cyan, 85% green, and 0% blue, you still have work to do—but "blue" might just be the residual dark sky, and the level may auto-fill it once cyan and green are complete. Check your progress meter; if it shows "3 colors done," you've won.
If you're short on one color (say, cyan is at 60% with three moves left), load and pour the remaining cyan cups without hesitation. Don't try to "balance" anymore; just finish the job. The last pour is often the most nerve-wracking, but Sand Loop 179 is forgiving if you've managed the slot economy well—you'll have the space to load and pour a final cup if needed.
If You Mess Up: Quick Recovery
If you accidentally load two green cups in a row and now your belt is filling green too fast, here's the lifeline: load a cyan 3 next, but don't pour it immediately. Let it sit one cycle while you tap the green cups to completion. Once those greens are gone, you can pour the cyan 3 to slow your progress.
If you've overfilled one color and can't load anything new without ruining the level, count your remaining cups. If you have no cyan or green left but only cream, you're in trouble—you probably made a sequencing error around move 4. Restart and adjust your opening rhythm. If you do have one colored cup left, load it, tap to pour at the very end, and hope the meter is close enough that overflow doesn't tank you.
Why This Strategy Works in Sand Loop 179
Respecting Conveyor Lead Time and Slot Economy
The strategy succeeds because it treats Sand Loop Level 179 like a pacing puzzle, not a speed puzzle. By loading one cup and pouring before loading the next, you ensure that the "cup in transit" is always accounted for in your mental belt inventory. When you tap cup A, you immediately know "cup A will reach the dispenser in 1.5 seconds, so I have exactly 1.5 seconds to decide if cup B should be loaded now or later." This removes surprises and deadlocks.
The 0/5 slot philosophy—never fill beyond 4/5 unless you're confident the next action empties the belt—creates a safety margin. You can always load one more cup if an opportunity arises, and you're never trapped by your own greed.
Controlling Waste and Preventing Color Overfill
By alternating cyan, green, and cyan in the opening phase, you're building a balanced foundation. This prevents the common failure mode of "cyan is at 100% but green is at 30%, and I have no more green cups left." The strategy also uses rank-3 cups as fine-tuning tools. If a color is almost full, a rank-3 pour is gentler than a rank-10 pour; it's your precision instrument for the final 20%.
Sand Loop Level 179 won't lock you out if one color hits 100% early—the game will still let you pour other colors and complete the puzzle. But visually overfilling looks catastrophic and psychologically tilts you. This strategy keeps all three colors clustered between 60–90% until the very end, making the finish feel controlled and inevitable rather than panicked and lucky.
Consistency Across Attempts
If you're retrying Sand Loop 179, this approach is muscle-memory friendly. You'll load cyan, pour cyan, load green, pour green, load cyan, pour cyan. It's a rhythm. Once you internalize that rhythm, move order becomes automatic, and you can focus entirely on watching the meters and adjusting based on how the colors are filling. This consistency means fewer "wait, what was my plan?" moments and more "I see the meters are X/Y, so I load Z" moments.
Extra Tips and Adaptations for Levels Like Sand Loop 179
Six Common Mistakes and Fixes
-
Mistake: Loading both cyan 10s back-to-back on move 2–3.
Fix: Load one, pour it, then decide if you need the second. Often a cyan 10 + a cyan 3 is enough to hit the cyan target without overshoot. -
Mistake: Ignoring the cream cups entirely and then being surprised when they block your view of the tray.
Fix: Accept that cream cups exist and aren't usable. Don't mentally double-take on them; they're visual noise. -
Mistake: Pouring a cup while the belt is already full (5/5).
Fix: Always check your belt capacity before tapping a cup to pour. If you're at 5/5, empty one cup first by waiting for the current pour to complete. -
Mistake: Waiting too long to load the first green cup and then scrambling to finish green in the final three moves.
Fix: Load green by move 6–7 at the latest. You need time to gauge how fast green fills; if it's slow, you can load another. If it's fast, you can pause. -
Mistake: Pouring to the wrong zone (e.g., pouring cyan to the sky when you meant to pour to the water).
Fix: The dispenser will pour to the appropriate zone automatically—you don't choose. Just be aware that cyan clouds and cyan water are separate zones and may fill at different rates. -
Mistake: Running out of moves or attempting to "brute force" a color in the final move.
Fix: If you're on move 15 and only at 70% green with no green cups left, you've already lost. Plan your color distribution by move 8 so you're on a path to victory, not discovery.
Boosters: When to Use Them
If your version of Sand Loop Level 179 offers boosters (extra slot, slower belt, undo, cup swap), consider them insurance only. An extra slot booster is genuinely useful if you're at 4/5 capacity and see a move-saving opportunity—it lets you load one more cup without waiting for a pour to finish. Activate it early (move 3–4) if you grab it, so you gain full value.
An undo booster is only worth using if you've made a catastrophic error (loaded two greens in a row when you meant to pause), and you're certain that restarting the last move solves it. Don't waste it on "I'm not sure if I made the right choice."
A slow belt booster isn't necessary for Sand Loop 179 if you're respecting your timing; the default conveyor speed is forgiving enough. Skip it unless you're struggling with rhythm.
Closing Encouragement
Sand Loop Level 179 is tough, but it's not unfair. The key is patience, sequencing, and respecting the slot economy. You've got everything you need to win in your starting tray; it's just a matter of unlocking the right cups in the right order. Once you clear Sand Loop 179, you'll have internalized the core skill of this game: thinking two moves ahead. If you're still stuck, head over to sand-loop.com for video walkthroughs and community tips—you're not alone, and every player who's beaten this level remembers the moment it clicked. Now go fill that canvas, and enjoy the beautiful landscape you create.