Sand Loop Level 176 Solution Walkthrough | Sand Loop 176
How to solve Sand Loop level 176? Get instant solution for Sand Loop 176 with our step by step solution & video walkthrough.


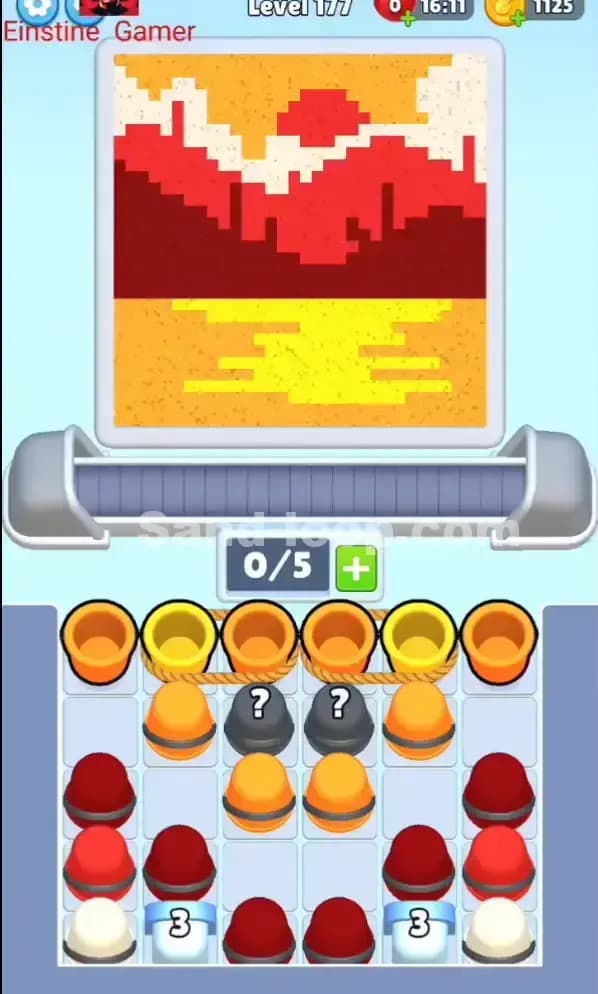
Sand Loop Level 176 Snapshot
The Goal Canvas
Sand Loop Level 176 presents a vibrant pixelated gift box or present design against a light cream background. The image is dominated by bright magenta, lime green, golden yellow, and royal blue blocks arranged in a symmetrical, decorative pattern—think ribbon-wrapped gift. You'll notice the background fills most of the canvas, which means you need to be strategic about not overshooting the secondary colors before you've locked in enough of that cream base. The color progress meters at the top show you're chasing multiple targets simultaneously, and that's where the real tension lives.
Starting Setup and Conveyor State
You begin with a 0/5 conveyor capacity—meaning you have five available slots, and all are empty. Looking at your supply tray, you've got a decent spread: magenta cups (multiple layers), red, orange, yellow, green, purple, and cream/white scattered across the stacking area. Some cups are buried deeper than others, which means you can't grab them immediately without unblocking. This is classic Sand Loop 176 puzzle design: you've got the colors you need, but the order and timing of access is the real constraint.
Win Condition
Fill the entire canvas to complete Sand Loop Level 176. You must reach the target amounts for magenta, green, yellow, blue, and cream without overfilling any single color so badly that you lock yourself out. Waste and contamination will drain your attempts fast, so every pour counts.
Why Sand Loop Level 176 Feels Hard (The Actual Bottleneck)
The Real Puzzle: Supply Tray Blocking
Sand Loop Level 176 isn't actually hard because the colors are rare—it's hard because the cream and green cups you need most are buried under magenta and red layers. You can see immediately that if you just load magenta first, you'll pour magenta into the meter before you've even touched cream, and then you're stuck chasing an unbalanced fill. The bottleneck is deciding which cup to unblock first without jamming your conveyor slots.
The Traps
Trap 1: The Magenta Overshoot. If you load all available magenta cups early, you'll pump magenta into the canvas way too fast, and you'll hit the magenta cap long before green and cream are even close. Then you're forced to stop loading magenta, but your conveyor is now full of cups you can't use—slots wasted.
Trap 2: Cream Starvation. The cream cups are scattered and partially blocked. If you don't plan their unblocking carefully, you'll run out of cream pours just as you're hitting the final stretch of the background fill. Sand Loop Level 176 will punish you by forcing an incomplete finish.
Trap 3: The Timing Lag. Your pour command happens instantly, but the cup doesn't reach the pour point for a few beats. If you're not accounting for that delay, you'll either load the wrong color at the wrong moment or accidentally pour twice in rapid succession.
Why It Looks Deceptively Easy
Honestly, I choked Sand Loop Level 176 twice because the setup looks manageable—you've got five slots, plenty of cup colors, and a straightforward design. But the pixel gift box's symmetry is deceiving. That balanced magenta–green–cream color scheme sounds easy until you're halfway through and realize the meter math was never in your favor to begin with. The trap is confidence.
Step-by-Step Walkthrough to Beat Sand Loop Level 176
Opening Rhythm: Load Smart, Leave Gaps
Start by loading one cream cup into slot 1. Don't rush. Tap it once and watch it travel down the belt. While that's in transit, load a green cup into slot 2. Now pause and do not fill slots 3, 4, and 5 immediately. You want at least two empty slots at this stage to give yourself breathing room and to prevent the "all-full conveyor deadlock" that kills runs.
Let those first two cups cycle through the pour point. Cream should start filling the background; green should start its meter. This first 15–20 seconds sets the tone for Sand Loop Level 176. You're not rushing; you're priming the pump.
Unblocking Plan: Free the Green Bottleneck
After your first cream and green cups have been loaded, focus on your tray. You'll see that deeper green cups are stacked below cream. Don't pull a cream cup yet—instead, load a magenta cup into slot 3, then immediately work on extracting a second green cup from the tray and loading it into slot 4. This alternation (magenta, then green, then magenta, then green) prevents any single color from spiking too early.
The key: unblock green aggressively but smartly. Every time you grab a green cup, you're freeing up space in the tray, which might unlock buried cream or yellow below it. Sand Loop Level 176's tray design rewards you for planned unblocking, not random grabbing.
Mid-Game Control: The Cycling Rhythm
Once you're three cups in, establish a pattern: magenta → green → magenta → yellow → cream → repeat. Keep slot 5 empty or reserved for a quick swap if you miscalculate. The conveyor belt will move at its standard pace, and as each cup reaches the pour zone, the corresponding color fills in. You're aiming for balanced meter growth—no single color should spike more than 20–30% ahead of the others.
Watch the color progress bars constantly. If magenta creeps above 60% while green is still at 30%, stop loading magenta immediately. Load cream or green instead. Sand Loop Level 176 punishes imbalance, so adaptive cup selection is your lifeline.
End-Game Precision: The Final 20%
When you're down to the last quarter of the canvas, switch into precision mode. Load cups one at a time and watch the meters before loading the next. If you're 85% complete and magenta is full, green is at 90%, and cream is at 75%, you're going to load only cream until cream hits 95%, then switch to green for the final taps.
This is where patience beats speed in Sand Loop Level 176. A single extra pour can overshoot you over the cap, waste a slot, and force a restart. Take your time. Breathe.
If You Mess Up: Recovery Tactics
Overfilled a color? Stop loading that color and pivot. If magenta is at 105% and green is at 60%, dump green cups into the belt for the next 30 seconds. You won't "undo" the magenta overshoot, but you can balance the remaining meter before Sand Loop Level 176 becomes unwinnable.
Wrong cup loaded? If you tap a magenta cup and realize you meant green, don't panic. The cup will reach the pour point in about 3 seconds. Load a green cup immediately after to dilute the impact. It's not ideal, but it's recoverable.
Conveyor jammed? All five slots full and nothing's moving? You over-committed. In your next attempt, keep those two empty slots sacred—never fill all five unless you're in the final five seconds.
Why This Strategy Works in Sand Loop Level 176
Conveyor Lead Time Mastery
By loading cups in a deliberate rhythm and watching the meters, you're accounting for the 2–3 second lag between your tap and the pour. This isn't a bug; it's the core mechanic of Sand Loop Level 176. The strategy respects that delay and uses it to your advantage. You're not reacting to pours—you're predicting them.
Slot Economy Prevents Deadlock
Keeping two slots empty at all times ensures that even if the tray gives you an annoying stack, you're never trapped waiting for a cup to clear. Sand Loop Level 176 designers built in this constraint deliberately. Honor it, and the level becomes solvable. Ignore it, and you'll jam up repeatedly.
Balanced Meter Growth Wins
The gift box design requires multiple colors in near-equal proportions. By rotating through magenta, green, and cream (with yellow and blue as fill-ins), you're keeping all meters within 10–20% of each other. This balance is what separates messy attempts from clean wins on Sand Loop Level 176.
Extra Tips and Adaptations for Levels Like Sand Loop Level 176
Mistake 1: Loading All Magenta First. Fix: Magenta should never exceed 40% of your pours in the opening phase. Treat it like a supporting color, not the lead.
Mistake 2: Ignoring the Cream Meter. Fix: Check cream's progress after every third pour. If it's lagging more than 15% behind green, adjust immediately.
Mistake 3: Filling All Conveyor Slots. Fix: Keep slots 4 and 5 empty unless you're in the final 10 seconds of the level.
Mistake 4: Pouring Continuously Without Gaps. Fix: Pause for one second between loads. Watch the meters update. Then decide the next cup color based on what you see.
Mistake 5: Not Unblocking Early. Fix: The first 30 seconds should include at least two "unblocking taps" where you prioritize extracting a color from a deep stack, even if you don't load it immediately.
Mistake 6: Panicking When Behind. Fix: If you're at 60% and the meters are unbalanced, you've still got time. Load the lagging color for the next 20 pours and reassess.
Booster Considerations
If you've got an extra slot booster, use it only if you're at the 80% mark and the tray is painfully blocked. It's a nice safety net but shouldn't be your crutch. A slow belt booster can help if you're struggling with timing; it gives you more time to react between pours. On Sand Loop Level 176, I'd recommend neither if you're following this strategy cleanly.
Closing Encouragement
Sand Loop Level 176 is tough, but it's not unfair. You've got the colors, the slots, and the time—you just need to respect the mechanics and stay balanced. Once you nail that first minute, the rest flows naturally. For more detailed solutions and community strategies, check out sand-loop.com. You've got this!